Accessibility Statement
    September 15, 2025 • Updated February 25, 2026

    Transform a Boring Flower Pot With Custom Fabric

    *Updated September 2025 What spruces up your home decor and brings a little bit of the outdoors in? Plants! What also does those things and shows off your personal style? Plants in fabric-covered terracotta flower pots! Whether you’re adding a new plant to your home or gifting a plant to someone dear, this quick and easy tutorial will step up your gardening game in a jiffy. *If you’re a visual learner, please see the video tutorial below! *
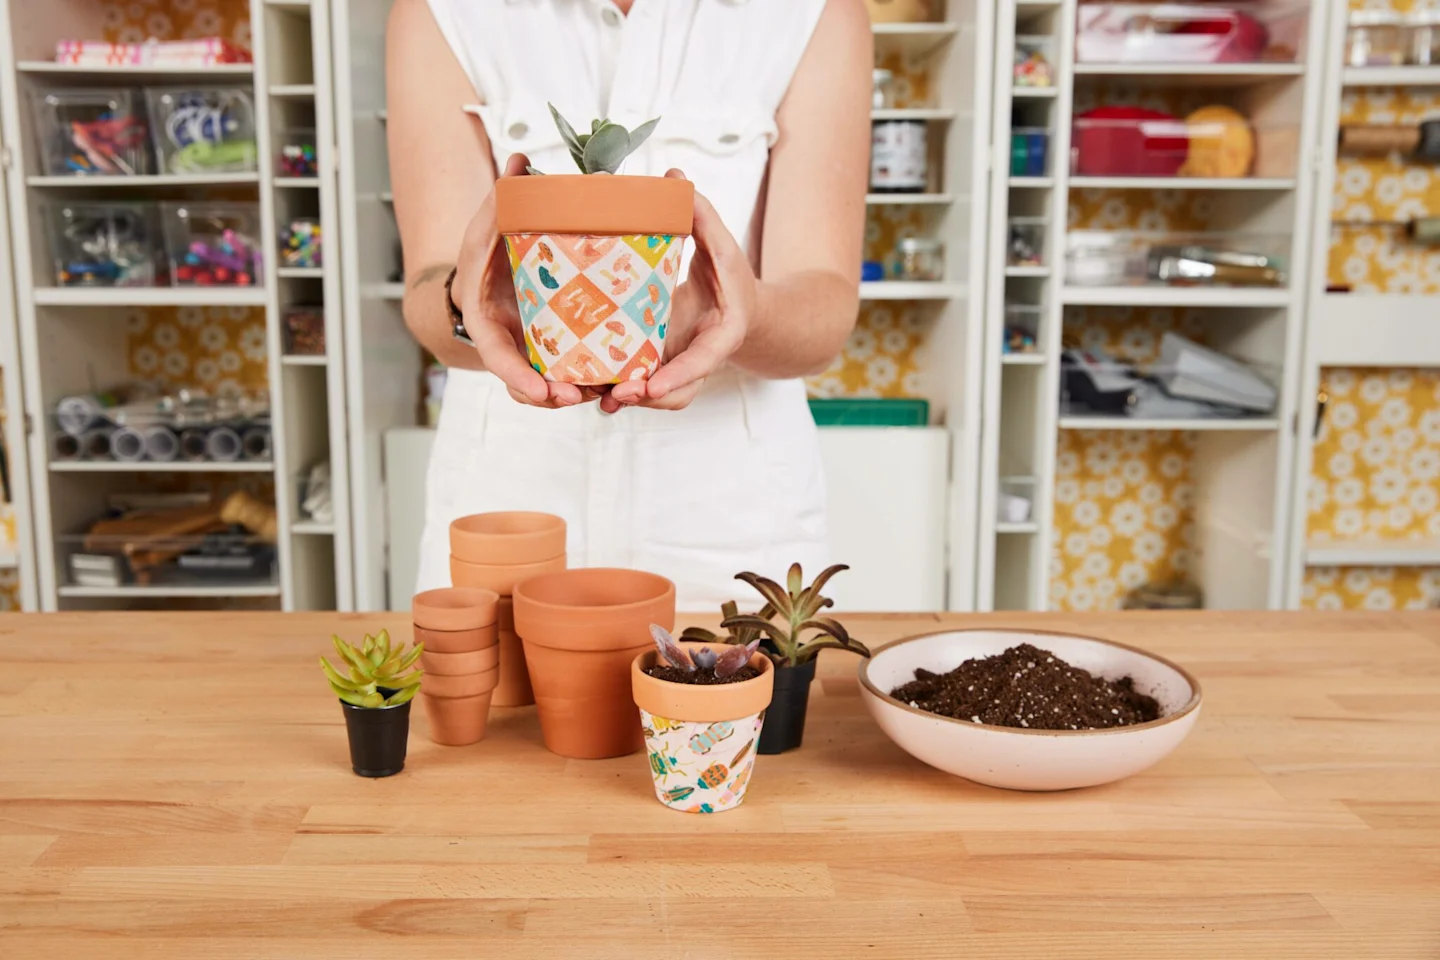
    A small succulent has been planted in a fully dried terracotta flower pot covered with fabric featuring small squares of small mushrooms in blue, white, green and peach. Alexa is holding up the finished project for the camera. Several other succulents, te
    This project makes for a simple afternoon DIY for yourself or with children. It’s also the perfect collaborative handmade-nature combo gift for teachers, co-workers, neighbors and other loved ones.* *This tutorial includes a free printable template to make the process a true snap. However, if your flower pot dimensions are outside of those noted in our template, we’ve also included instructions to make your own DIY template. Skill Level: Beginner
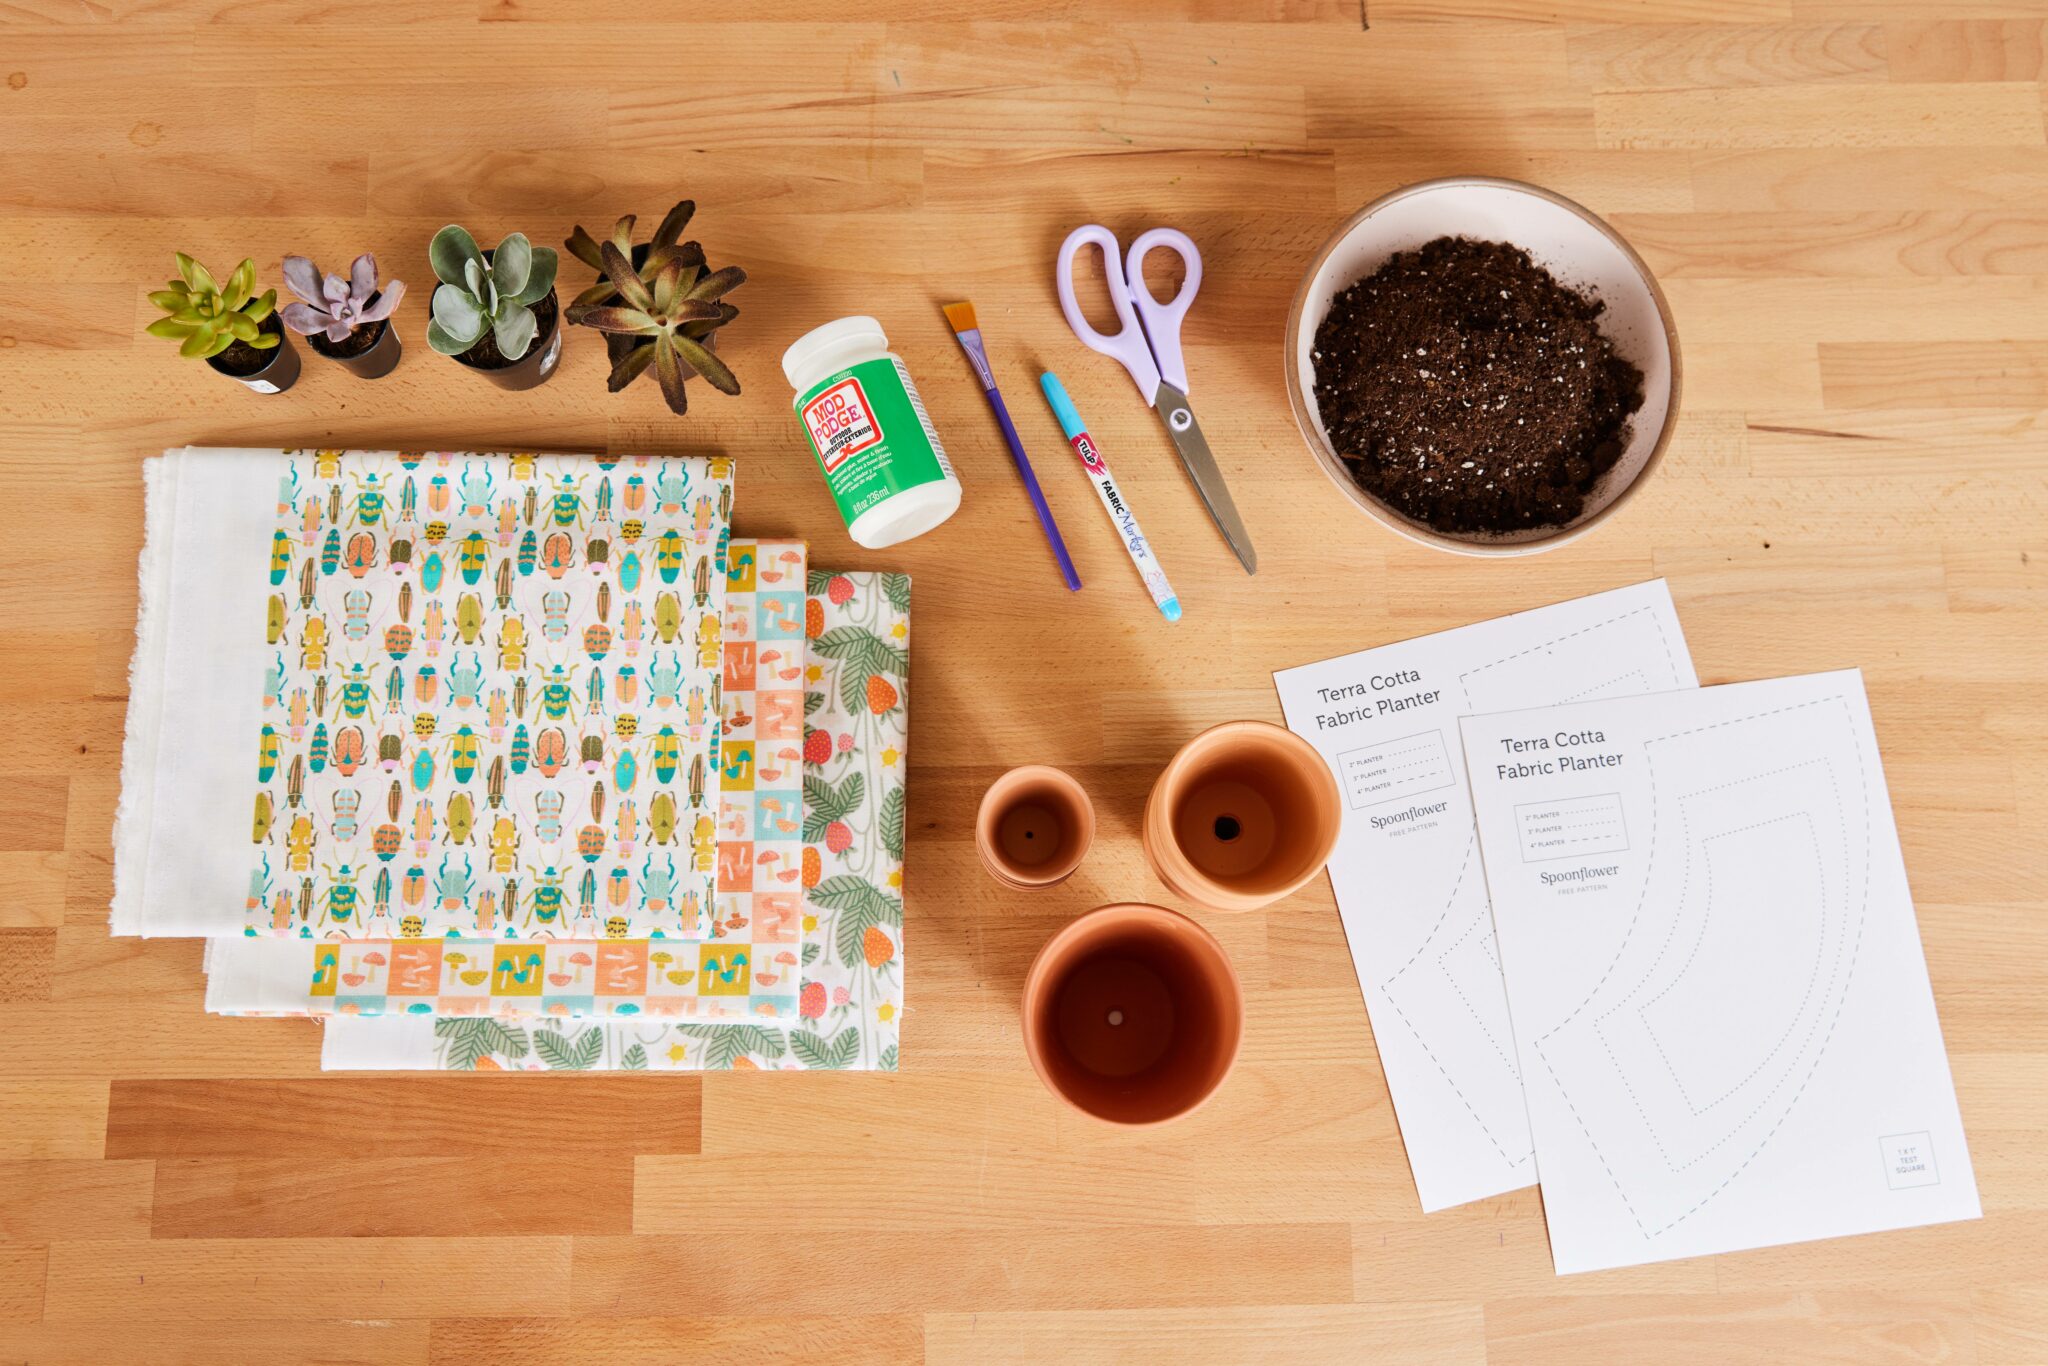
    All the materials from the list below, which you’ll need for the fabric-covered flower pot tutorial, are laid out on a brown wooden table. 
    All the materials from the list below, which you’ll need for the fabric-covered flower pot tutorial, are laid out on a brown wooden table. 

    Materials Needed

    • 1 fat quarter of Petal Signature Cotton® (sturdy woven fabric scraps also work for this project)
    • Scissors
    • Marking utensil (pen, pencil, etc.)
    • Mod Podge® Outdoor
    • Paintbrush
    • Terracotta flower pots in a size of your choice (we’re using a 4” (10.2 cm) planter)
    • Soil
    • Plant
    • Printable template
    • Optional: If creating your own template, you’ll also need an 8.5” x 11” (21.6 cm x 28 cm) piece of paper
    • Optional: If you’d like to make your flower pot waterproof, we recommend using a sealer before step 7).

    ** Fabric-covered Flower Pot Video Tutorial and Steps**

    https://www.youtube.com/embed/ymtvqlAzrV8?feature=oembed

    https://www.youtube.com/embed/ymtvqlAzrV8?feature=oembed

    Step 1. Choose your template

    The printable template we’ve created is based on three common small flower pot heights: 2”, 3” or 4” tall. (That’s either 5.1, 7.6 or 10.2 centimeters.) If you know the height of your pot and it’s one of those three sizes, great! You can proceed to step 2. If you don’t know the height of your pot, measure it from top to bottom. If your flower pot size is not noted in the printable template (or it is and you either don’t have a printer or are feeling adventurous!), skip to the bottom of the post to learn how to make your own template.

    Step 2. Print out (or create!) your template

    If your flower pot is one of the sizes in our free printable template, print the template out on a standard sheet of 8.5” x 11” (21.6 cm x 28 cm) paper. Regular printer paper will work, but printing on cardstock will make it a bit easier to trace your template onto your fabric. If you’re creating your own DIY template, use the instructions further down the page to create your own template and then proceed to step 3.
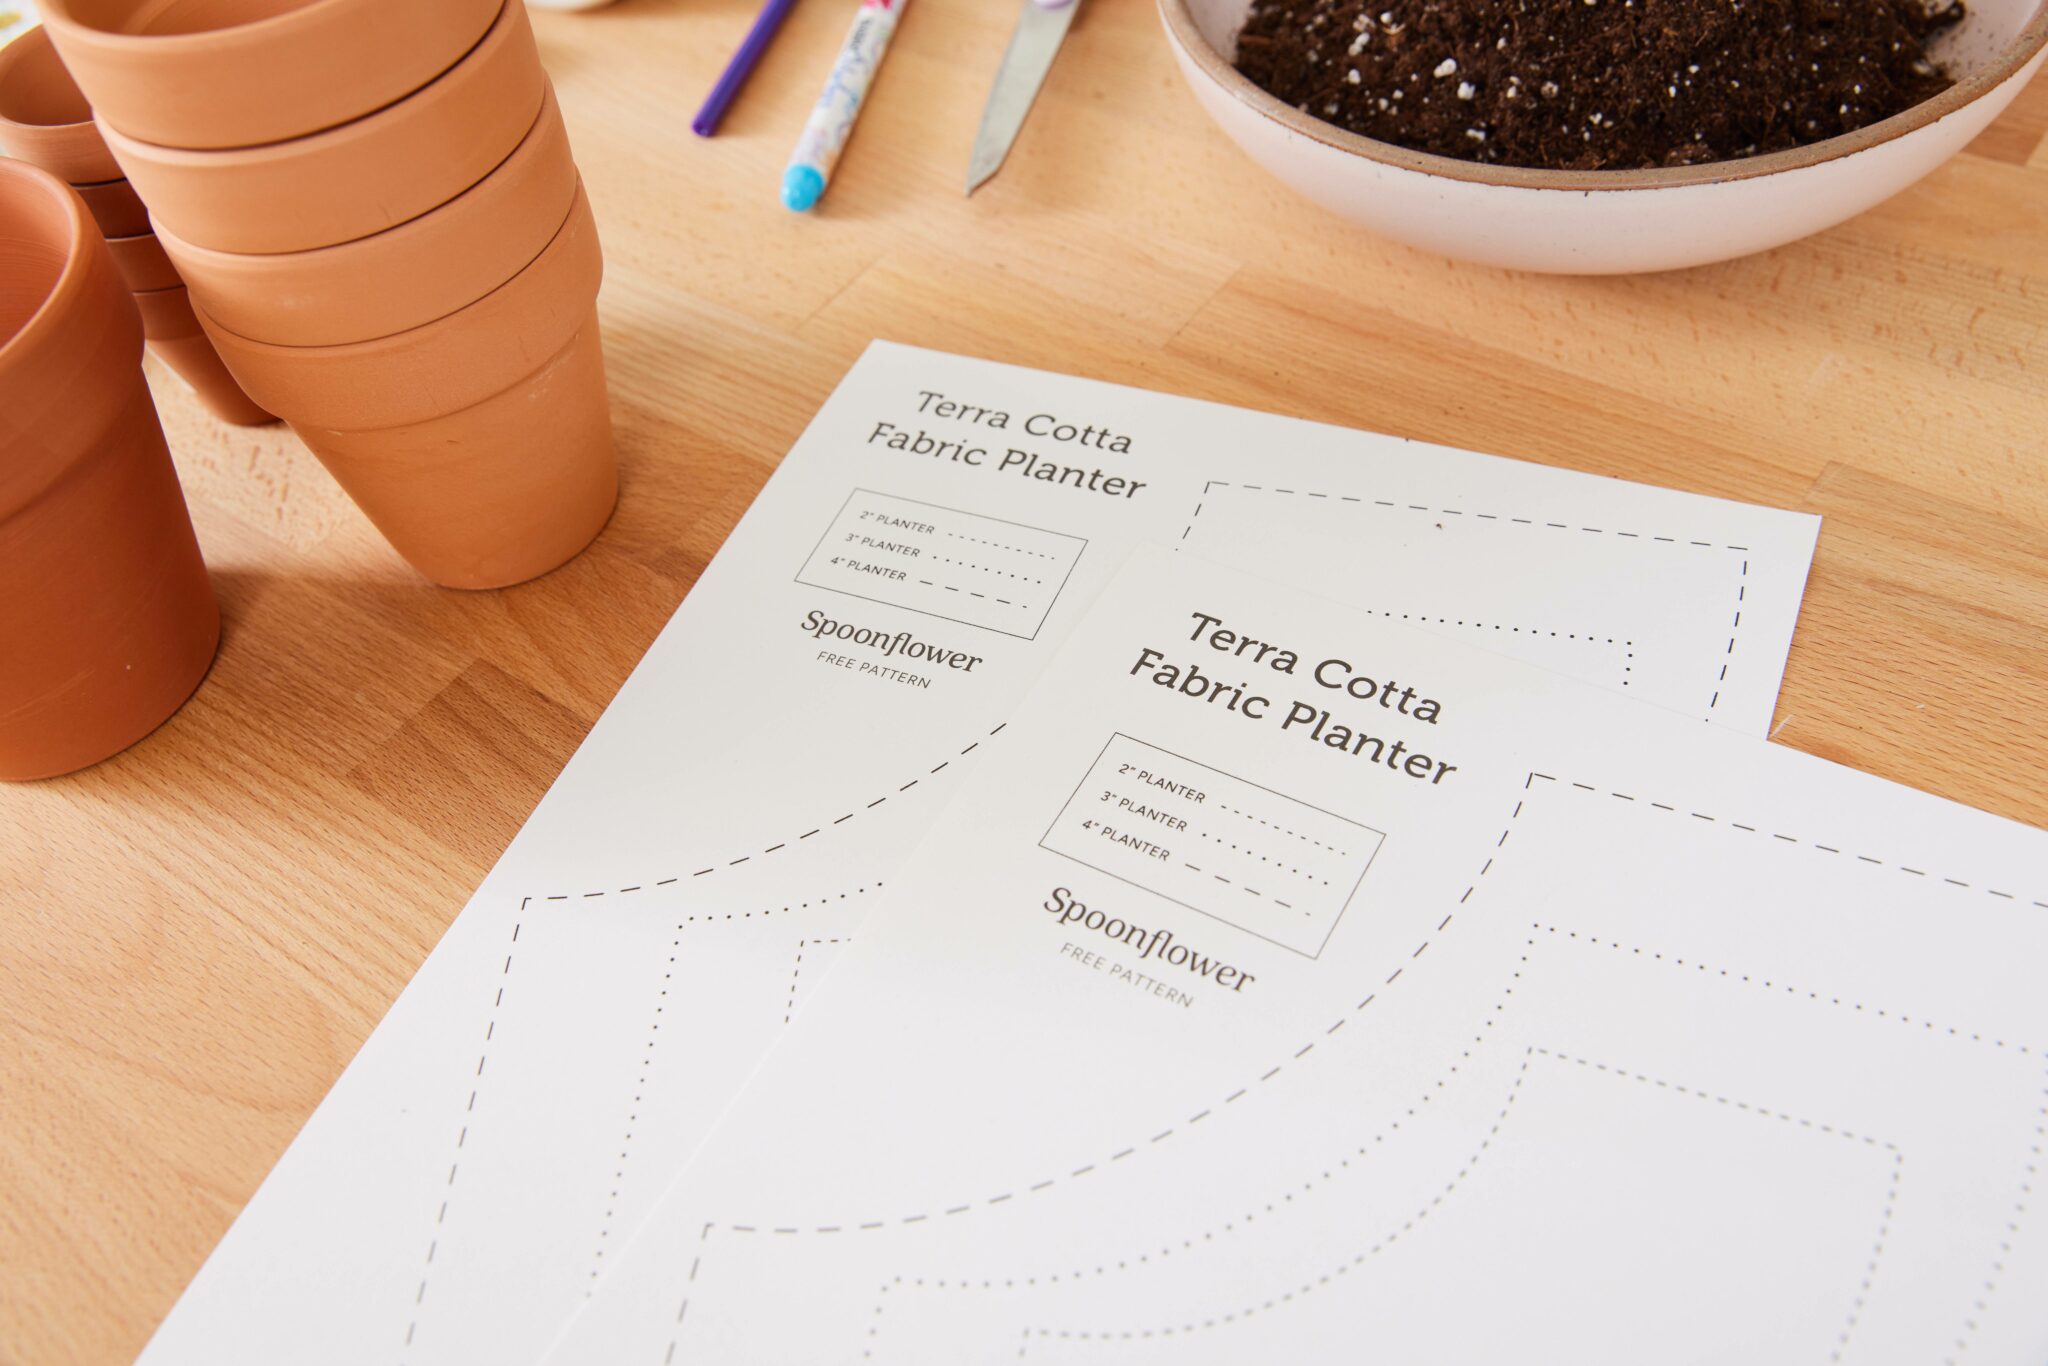
    The printed template for the fabric-covered flower pot has been printed out twice, to make two fabric-covered flower pots. The paper pieces are lying on a wooden table with two stacks of terracotta pots to the left and a bowl of dirt to the top. 
    The printed template for the fabric-covered flower pot has been printed out twice, to make two fabric-covered flower pots. The paper pieces are lying on a wooden table with two stacks of terracotta pots to the left and a bowl of dirt to the top. 

    Step 3. Cut out your template

    If you’re using our printable template, cut out the arc shape based on your pot’s measurement. If you’re using a DIY template that you created, cut out the template piece from the larger piece of paper.
    Alexa cuts out the pattern for a 4” (10.2 cm) flower pot from our tutorial template. A folded piece of fabric featuring small squares each featuring small mushrooms in blue, white, green and peach is laying on the table. 
    Alexa cuts out the pattern for a 4” (10.2 cm) flower pot from our tutorial template. A folded piece of fabric featuring small squares each featuring small mushrooms in blue, white, green and peach is laying on the table. 

    Step 4. Double check that your template fits your flower pot

    Once you have your paper template cut out, make sure that your template is the right size. You can do this by wrapping the template around the pot. It should cover all sides of the pot, as well as the bottom. If it’s too small or too large, you’ll need to adjust the size of your template accordingly.
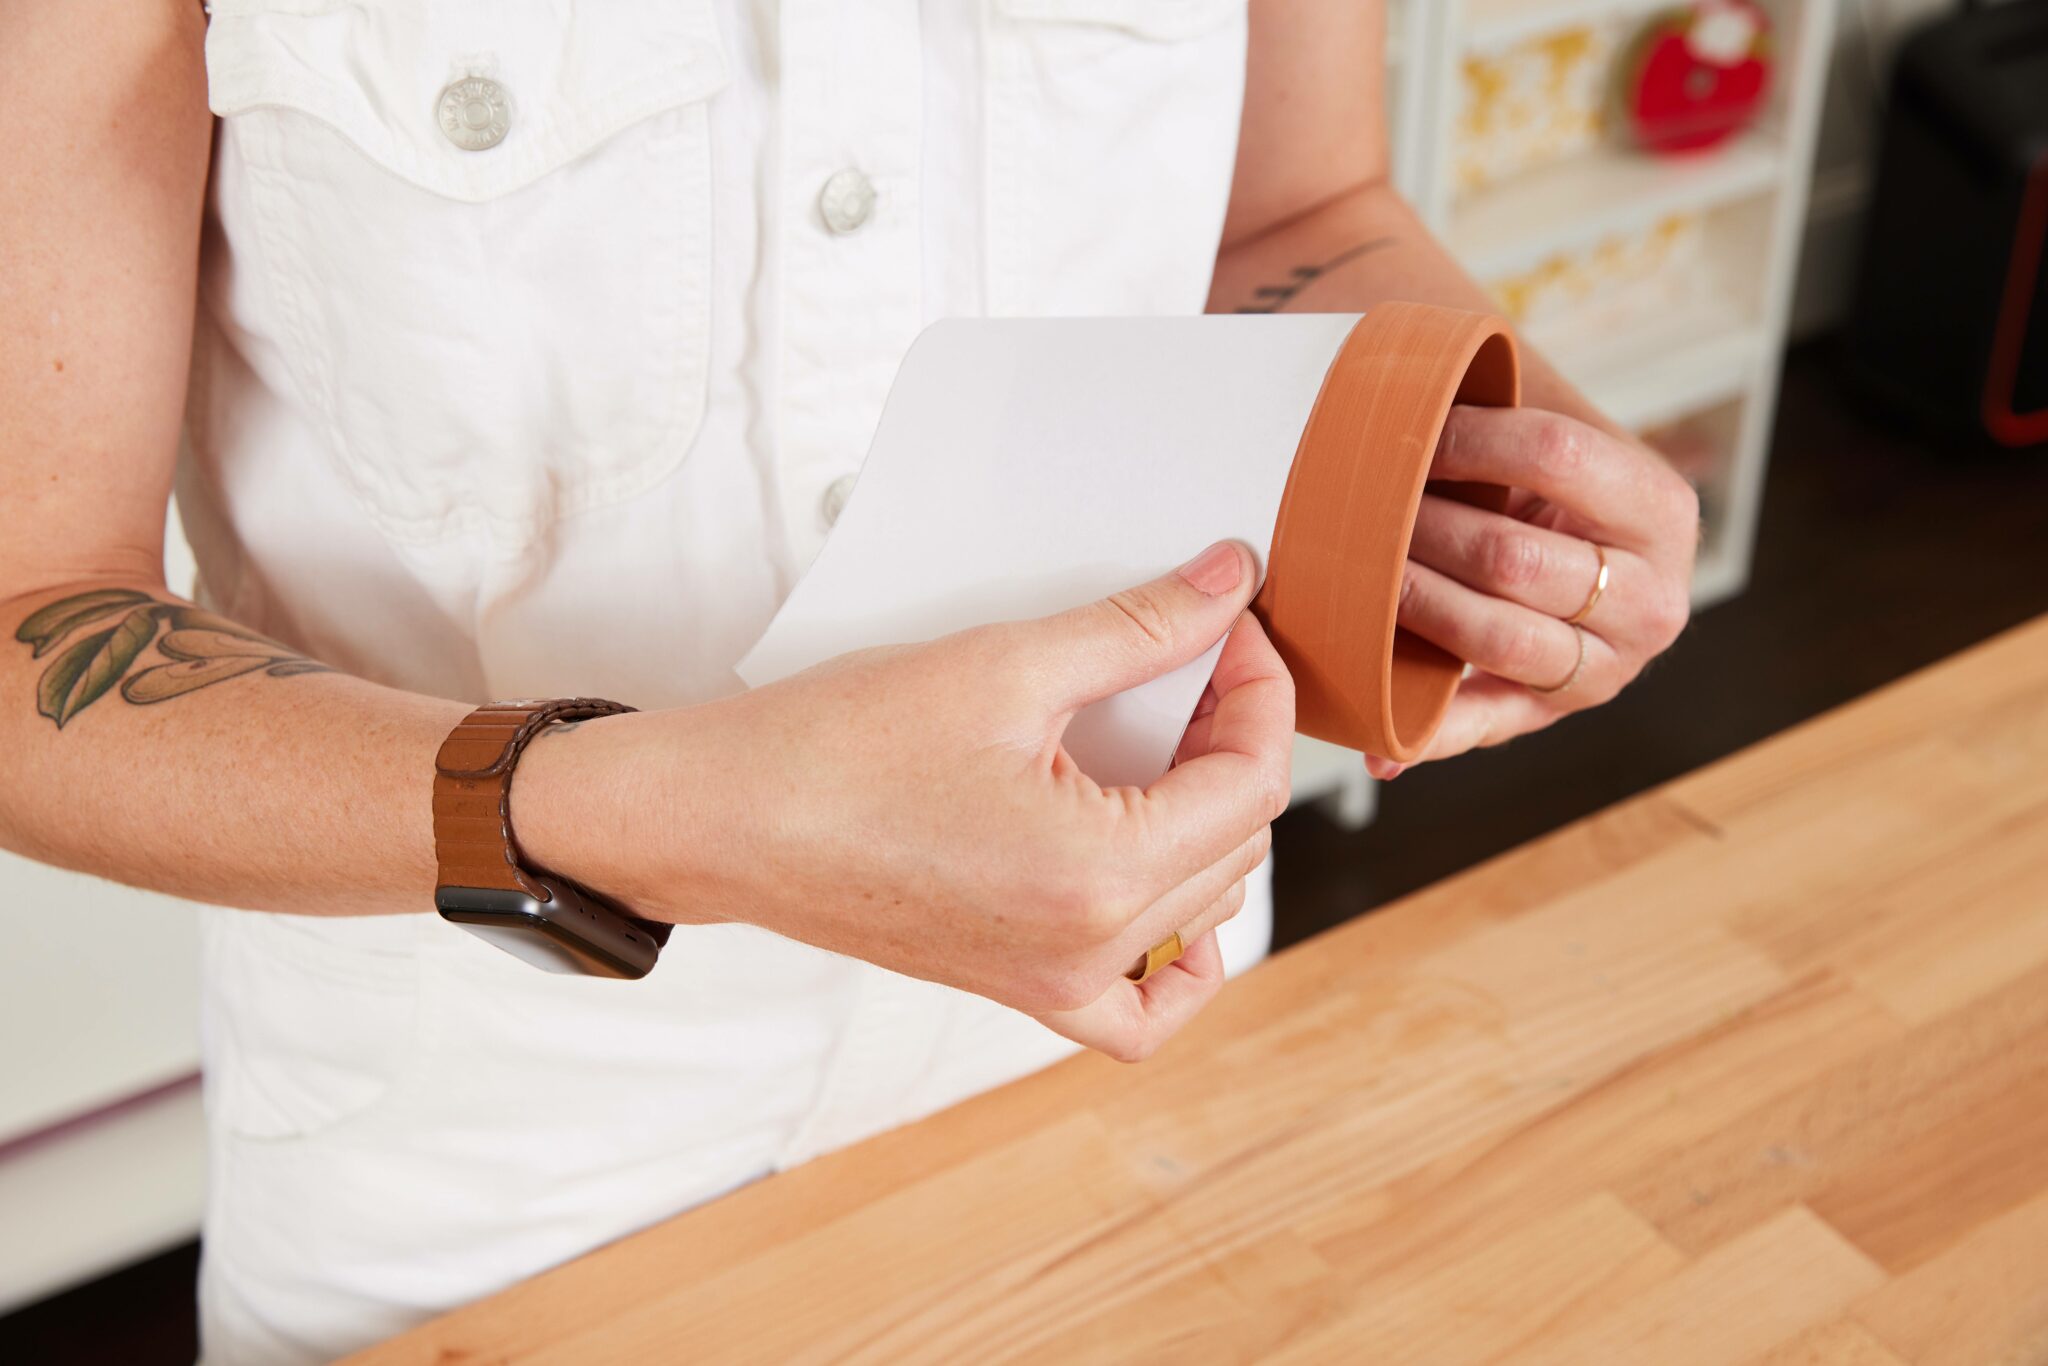
    Alexa wraps her template around her flower pot to make sure the fabric covers the whole body of the pot.
    Alexa wraps her template around her flower pot to make sure the fabric covers the whole body of the pot.

    **Step 5. Trace your template on your fabric **
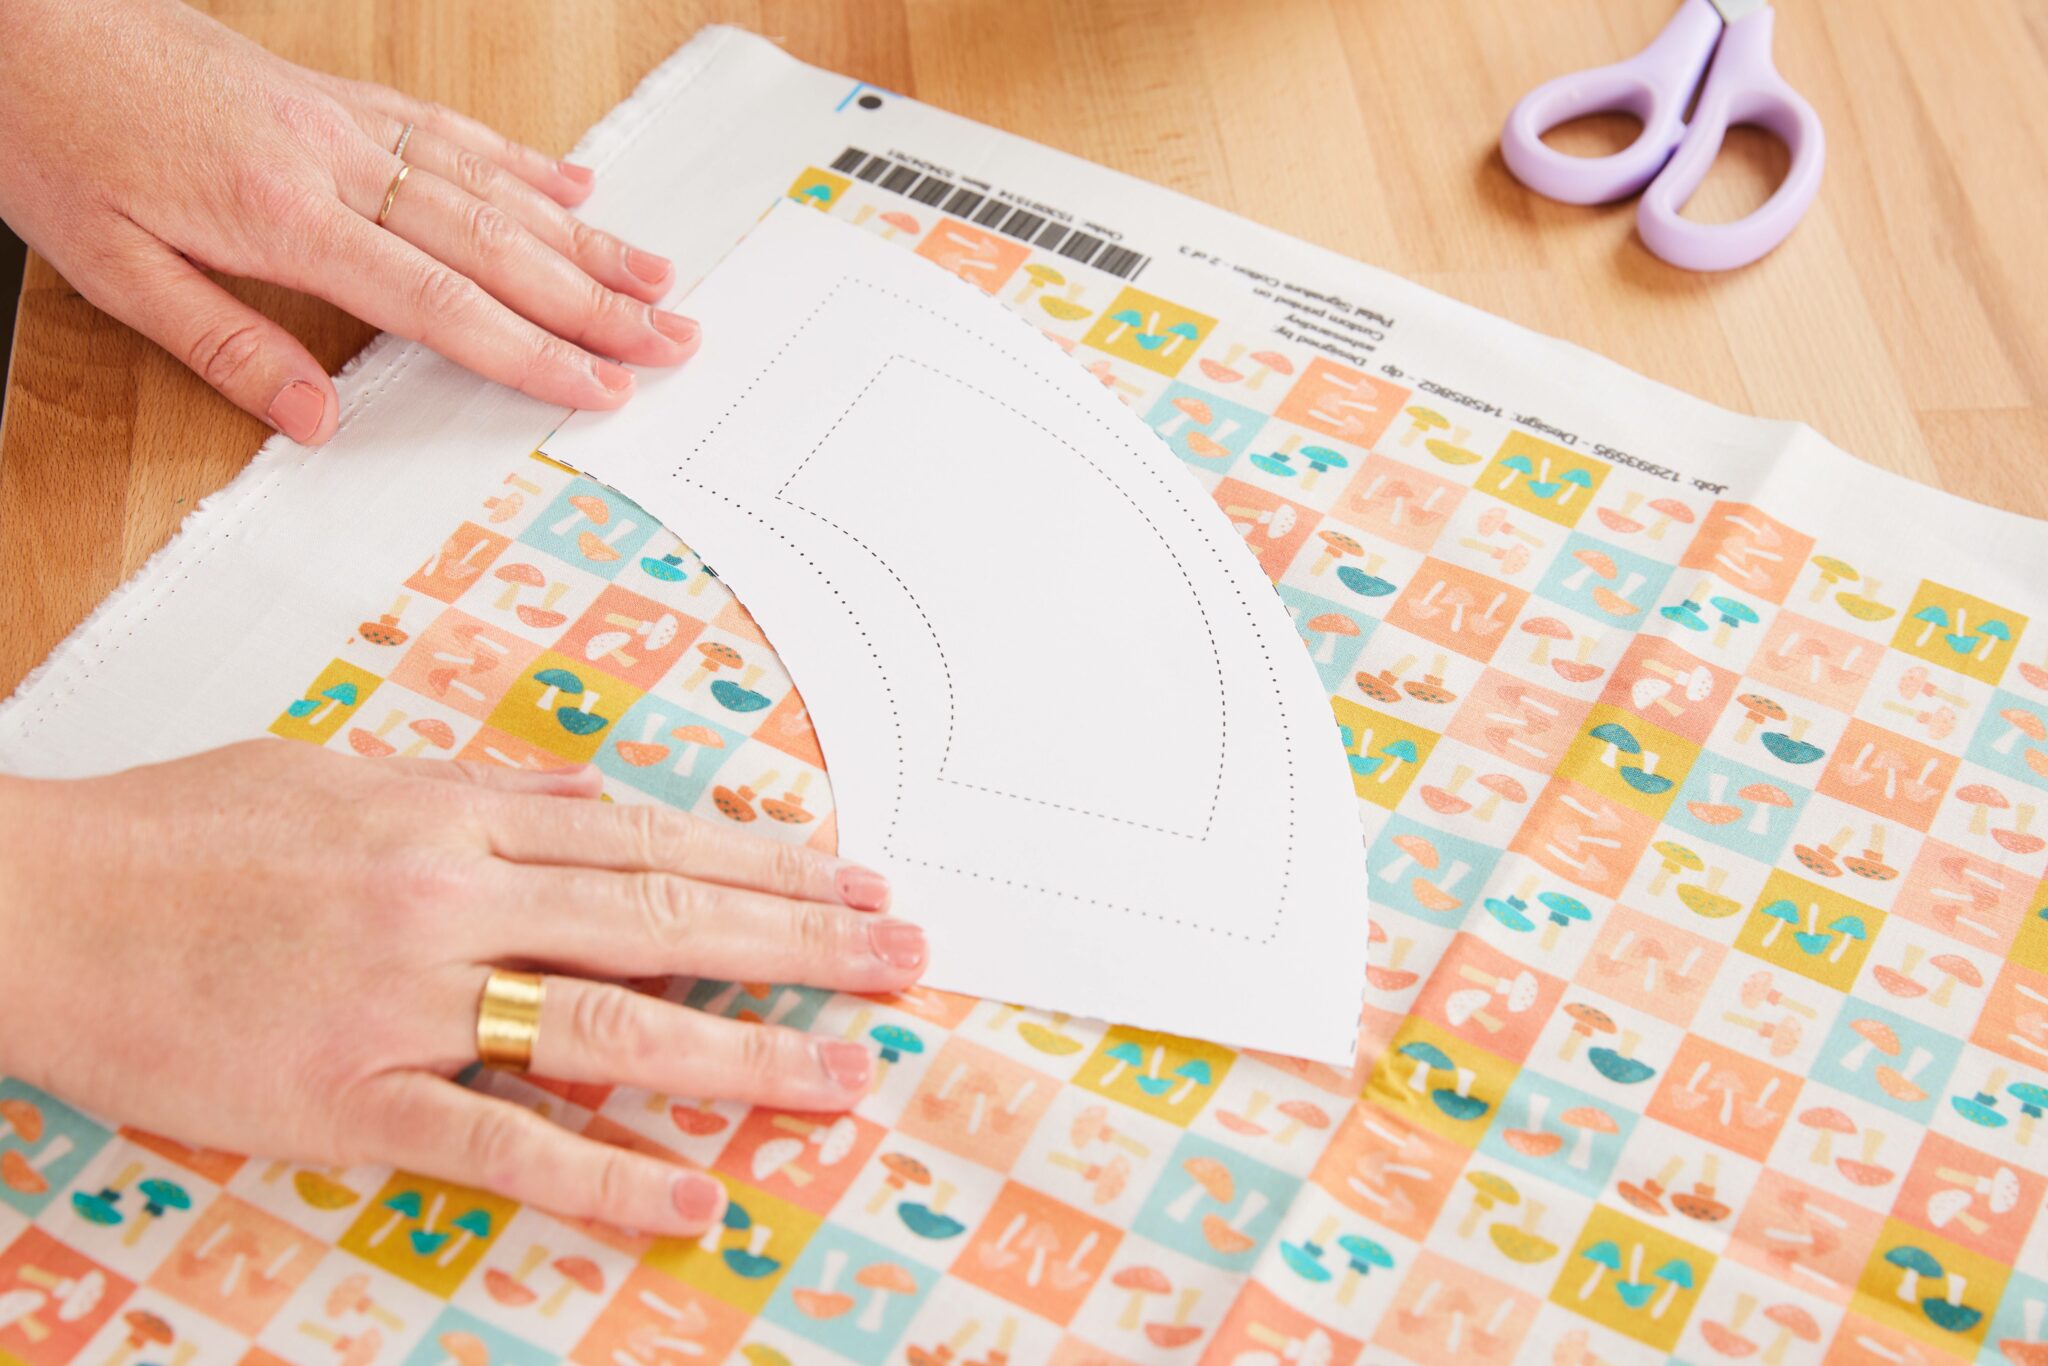
    Alexa places the cut-out pattern piece for a 4” (10.2 cm) flower pot from our tutorial template on top of fabric that features small squares each featuring small mushrooms in blue, white, green and peach is laying on the table.
    Alexa places the cut-out pattern piece for a 4” (10.2 cm) flower pot from our tutorial template on top of fabric that features small squares each featuring small mushrooms in blue, white, green and peach is laying on the table.
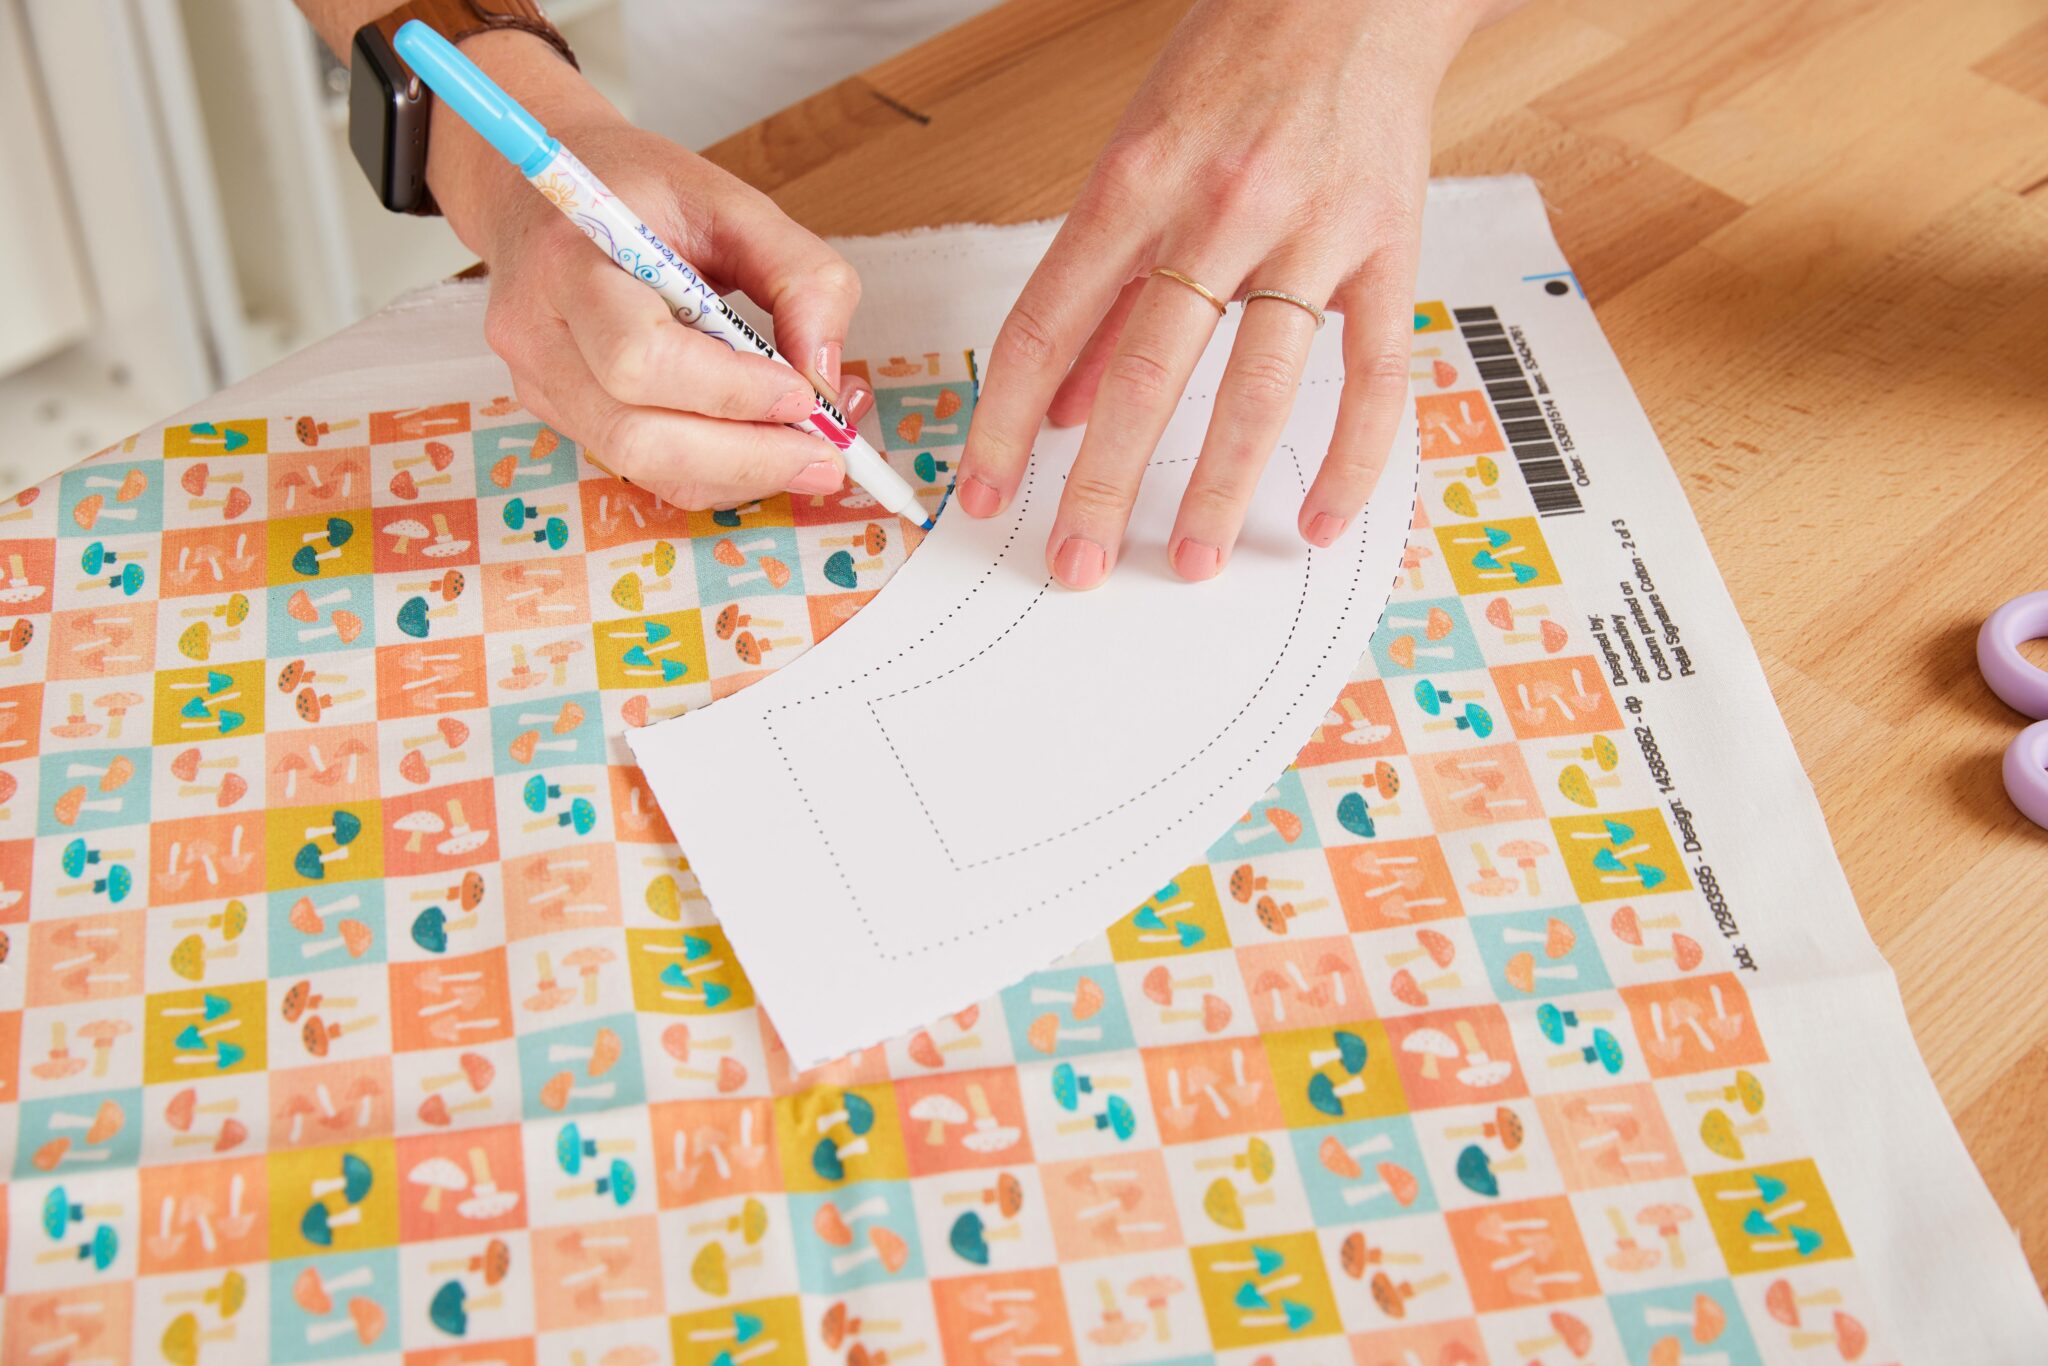
    Alexa traces the cut-out pattern piece for a 4” (10.2 cm) flower pot from our tutorial template onto fabric that features small squares each featuring small mushrooms in blue, white, green and peach is laying on the table.
    Alexa traces the cut-out pattern piece for a 4” (10.2 cm) flower pot from our tutorial template onto fabric that features small squares each featuring small mushrooms in blue, white, green and peach is laying on the table.
    Take your paper template and place it on the right side of your fabric. Next, trace around the edge of your paper template directly on to the fabric.

    Step 6. Cut out your fabric template

    To cut out your fabric piece using your paper template, cut out the fabric around the lines you traced in the previous step.
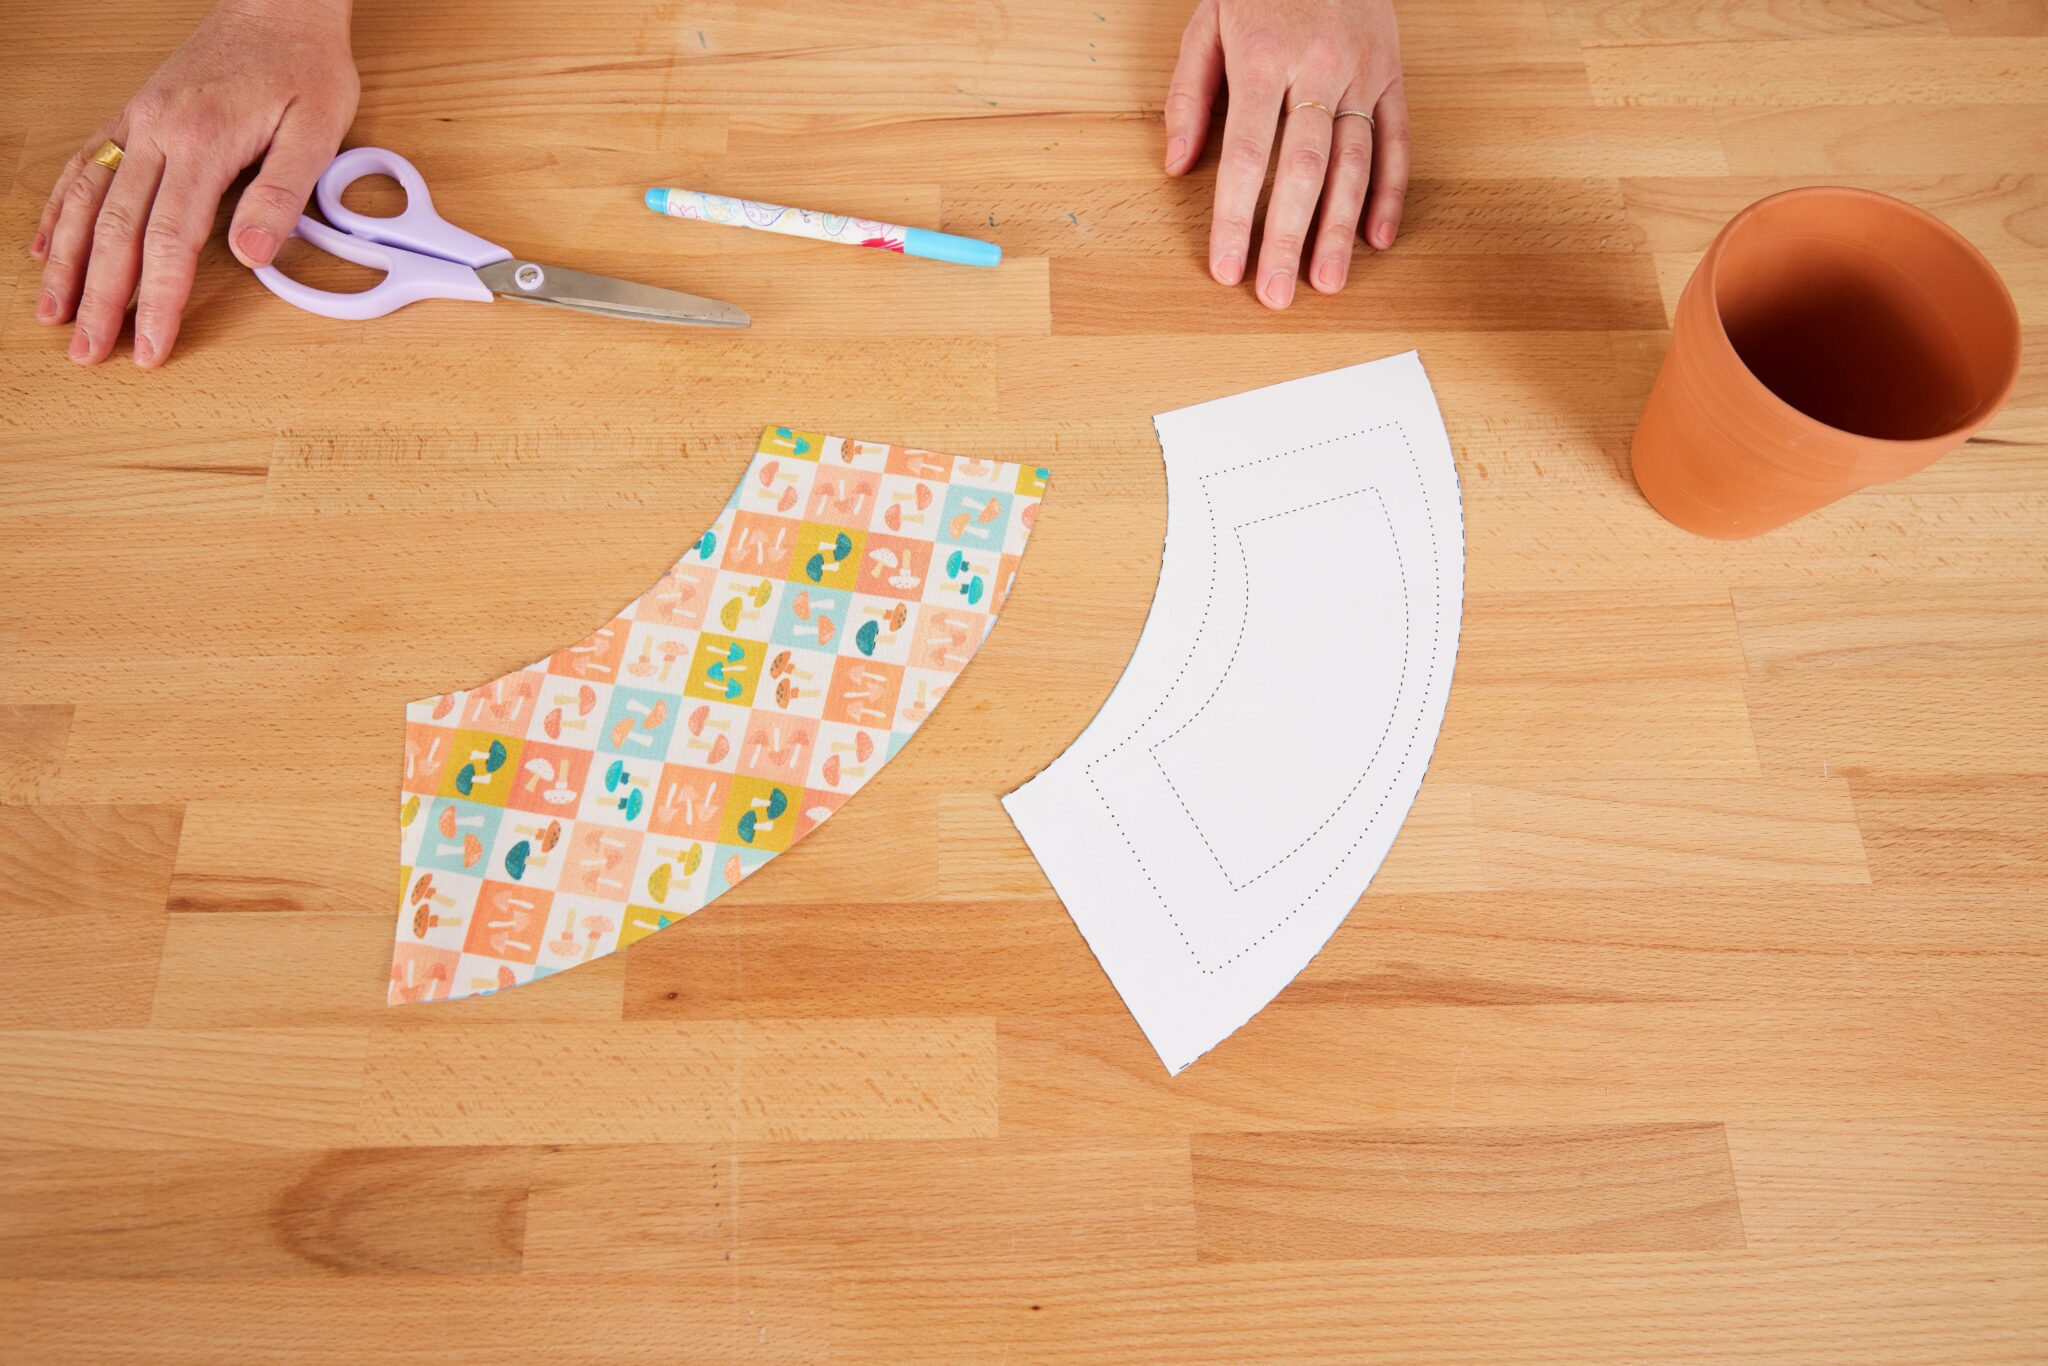
    A cut-out pattern piece in both paper and fabric lay on a wooden table. They are fit to cover a 4” (10.2 cm flower pot). 
    A cut-out pattern piece in both paper and fabric lay on a wooden table. They are fit to cover a 4” (10.2 cm flower pot). 

    Looking to make your flower pot waterproof?

    Step **7. Paint the pot’s exterior with Mod Podge Outdoor **

    Using a paintbrush, liberally apply your Mod Podge Outdoor all the way around the pot, working quickly so it doesn’t dry out.
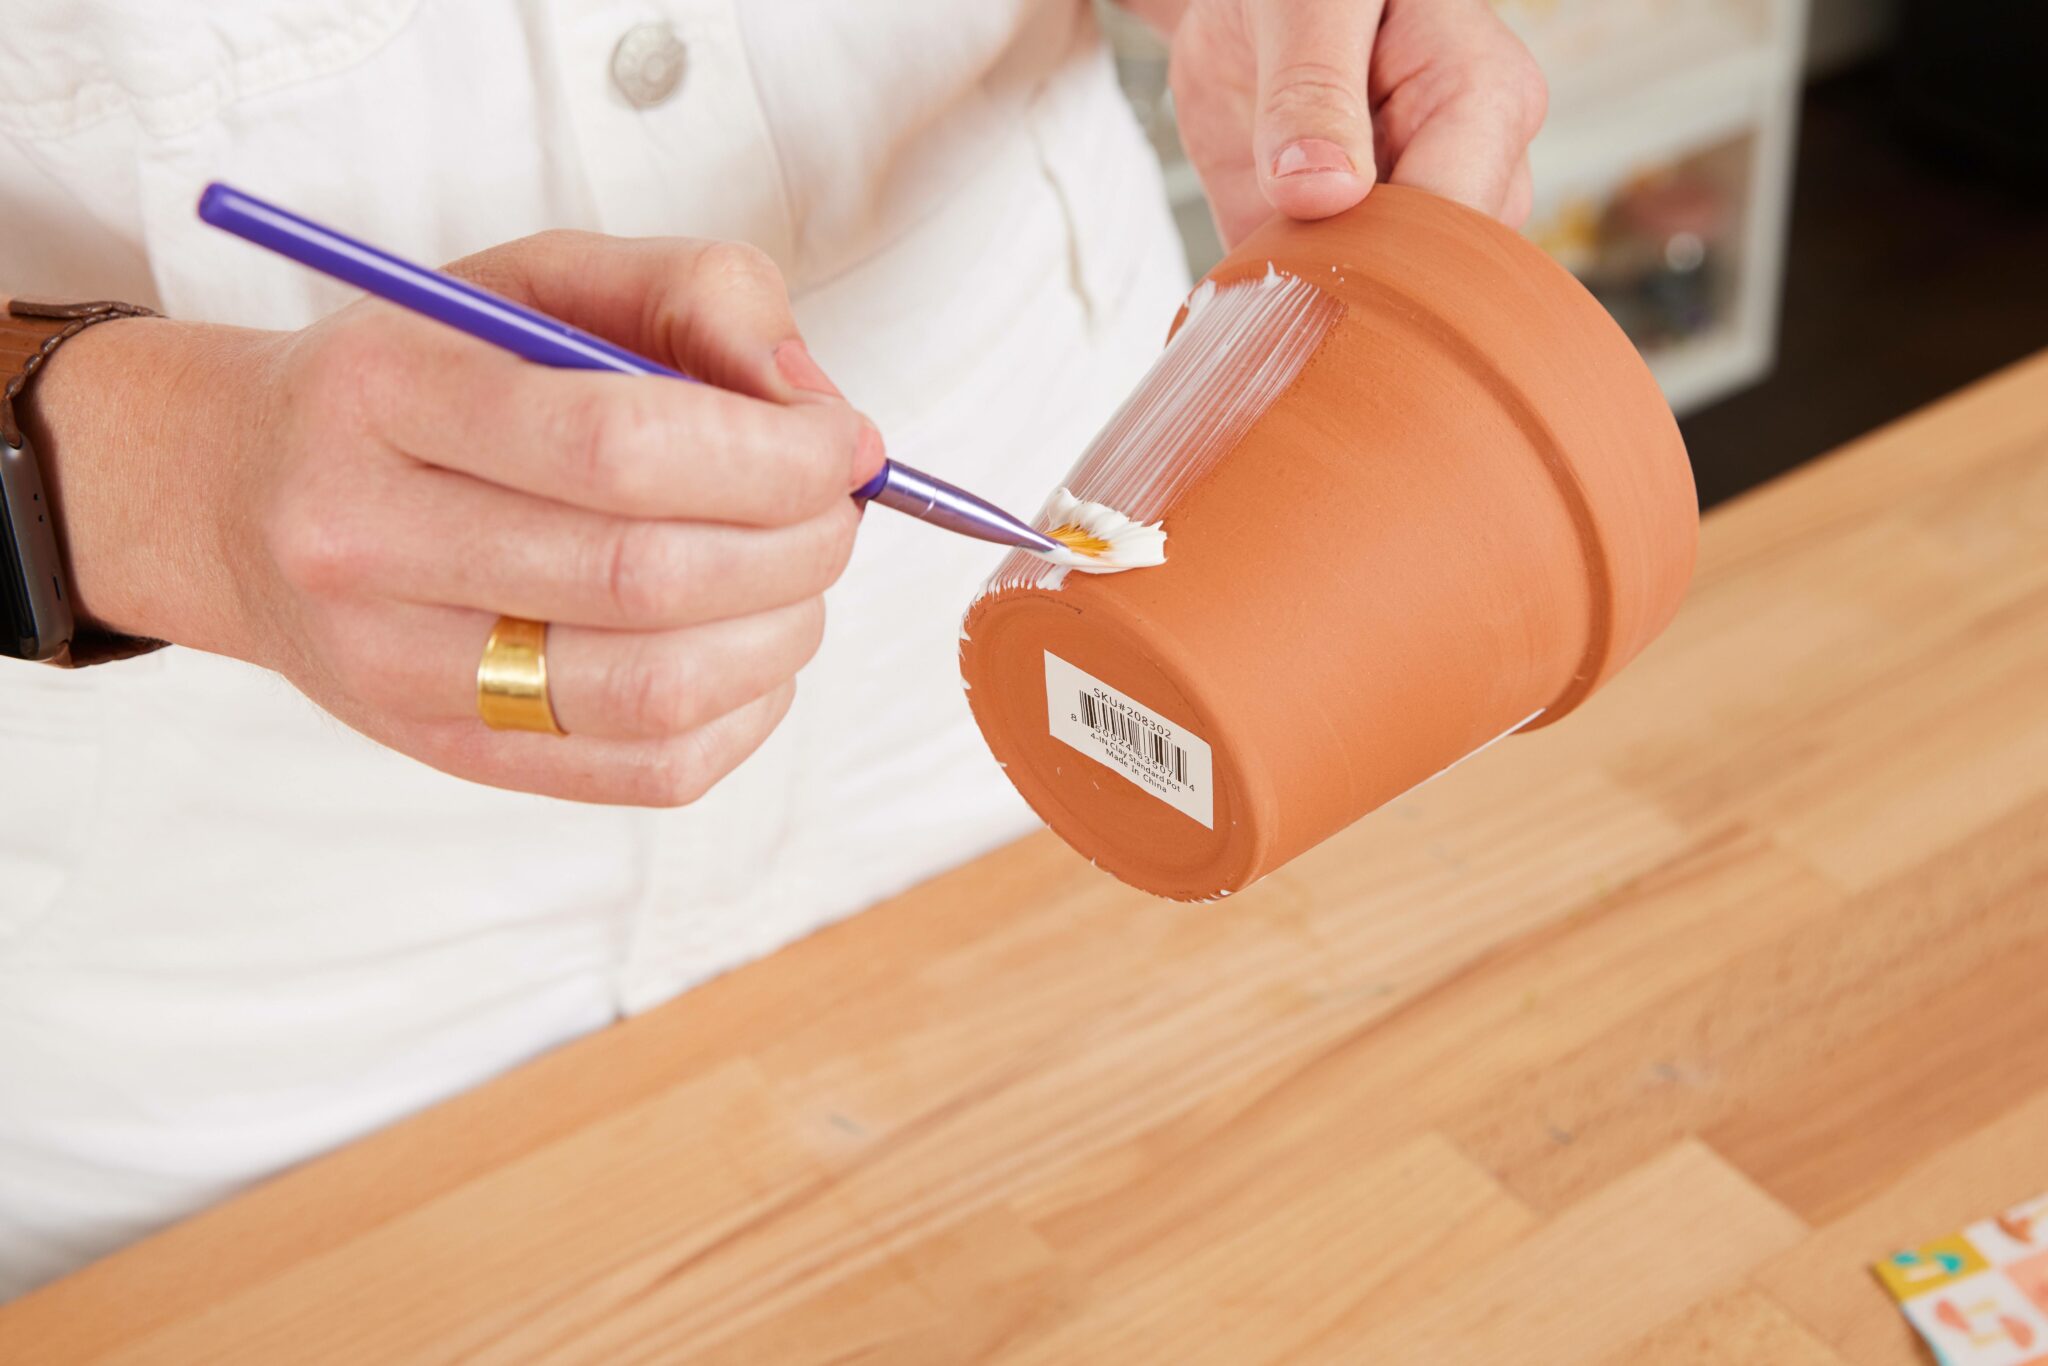
    Alexa uses a paintbrush to liberally cover the terracotta pot with Mod Podge Outdoor. The glue paints on white, but will eventually dry clear.
    Alexa uses a paintbrush to liberally cover the terracotta pot with Mod Podge Outdoor. The glue paints on white, but will eventually dry clear.

    Step **8. Wrap your fabric around the flower pot **

    On top of the wet Mod Podge Outdoor, wrap your fabric around the pot, pressing down as you go. Any overlapping fabric can be secured with extra Mod Podge Outdoor.
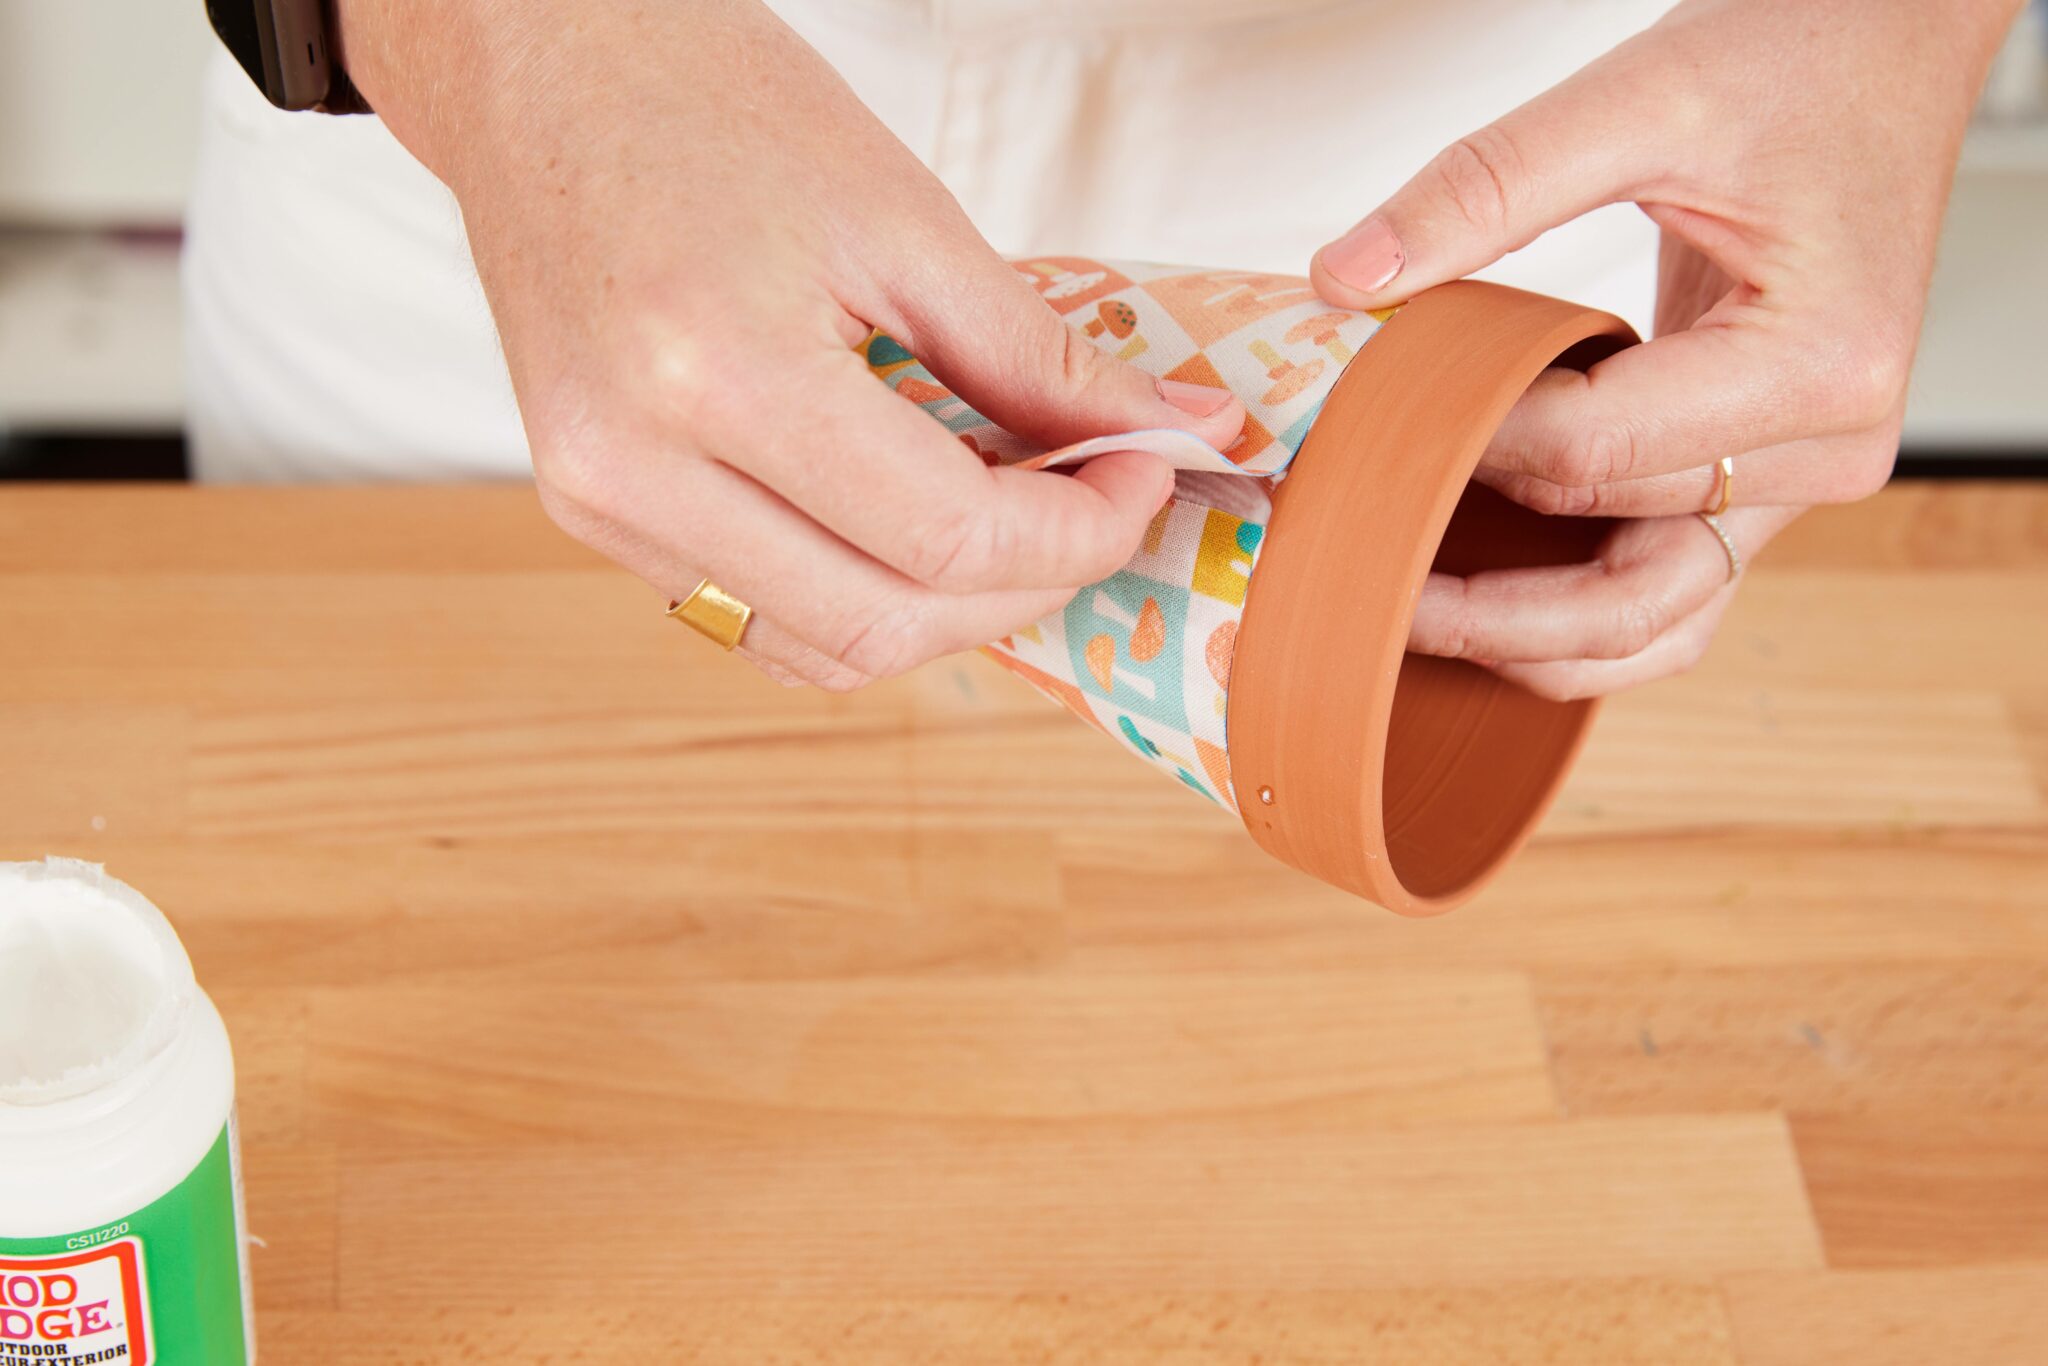
    Alexa wraps the flower pot with fabric featuring small squares of small mushrooms in blue, white, green and peach.
    Alexa wraps the flower pot with fabric featuring small squares of small mushrooms in blue, white, green and peach.

    Step 9. Apply another coat of Mod Podge Outdoor on top of the fabric

    Apply a nice, even coat of the Mod Podge Outdoor to the exterior of the fabric all the way around the pot. This step adds an extra layer of water resistance and makes sure the fabric stays in place, especially where the two fabric edges meet. You don’t have to wait until the first coat of Mod Podge Outdoor is fully dry to do this step.
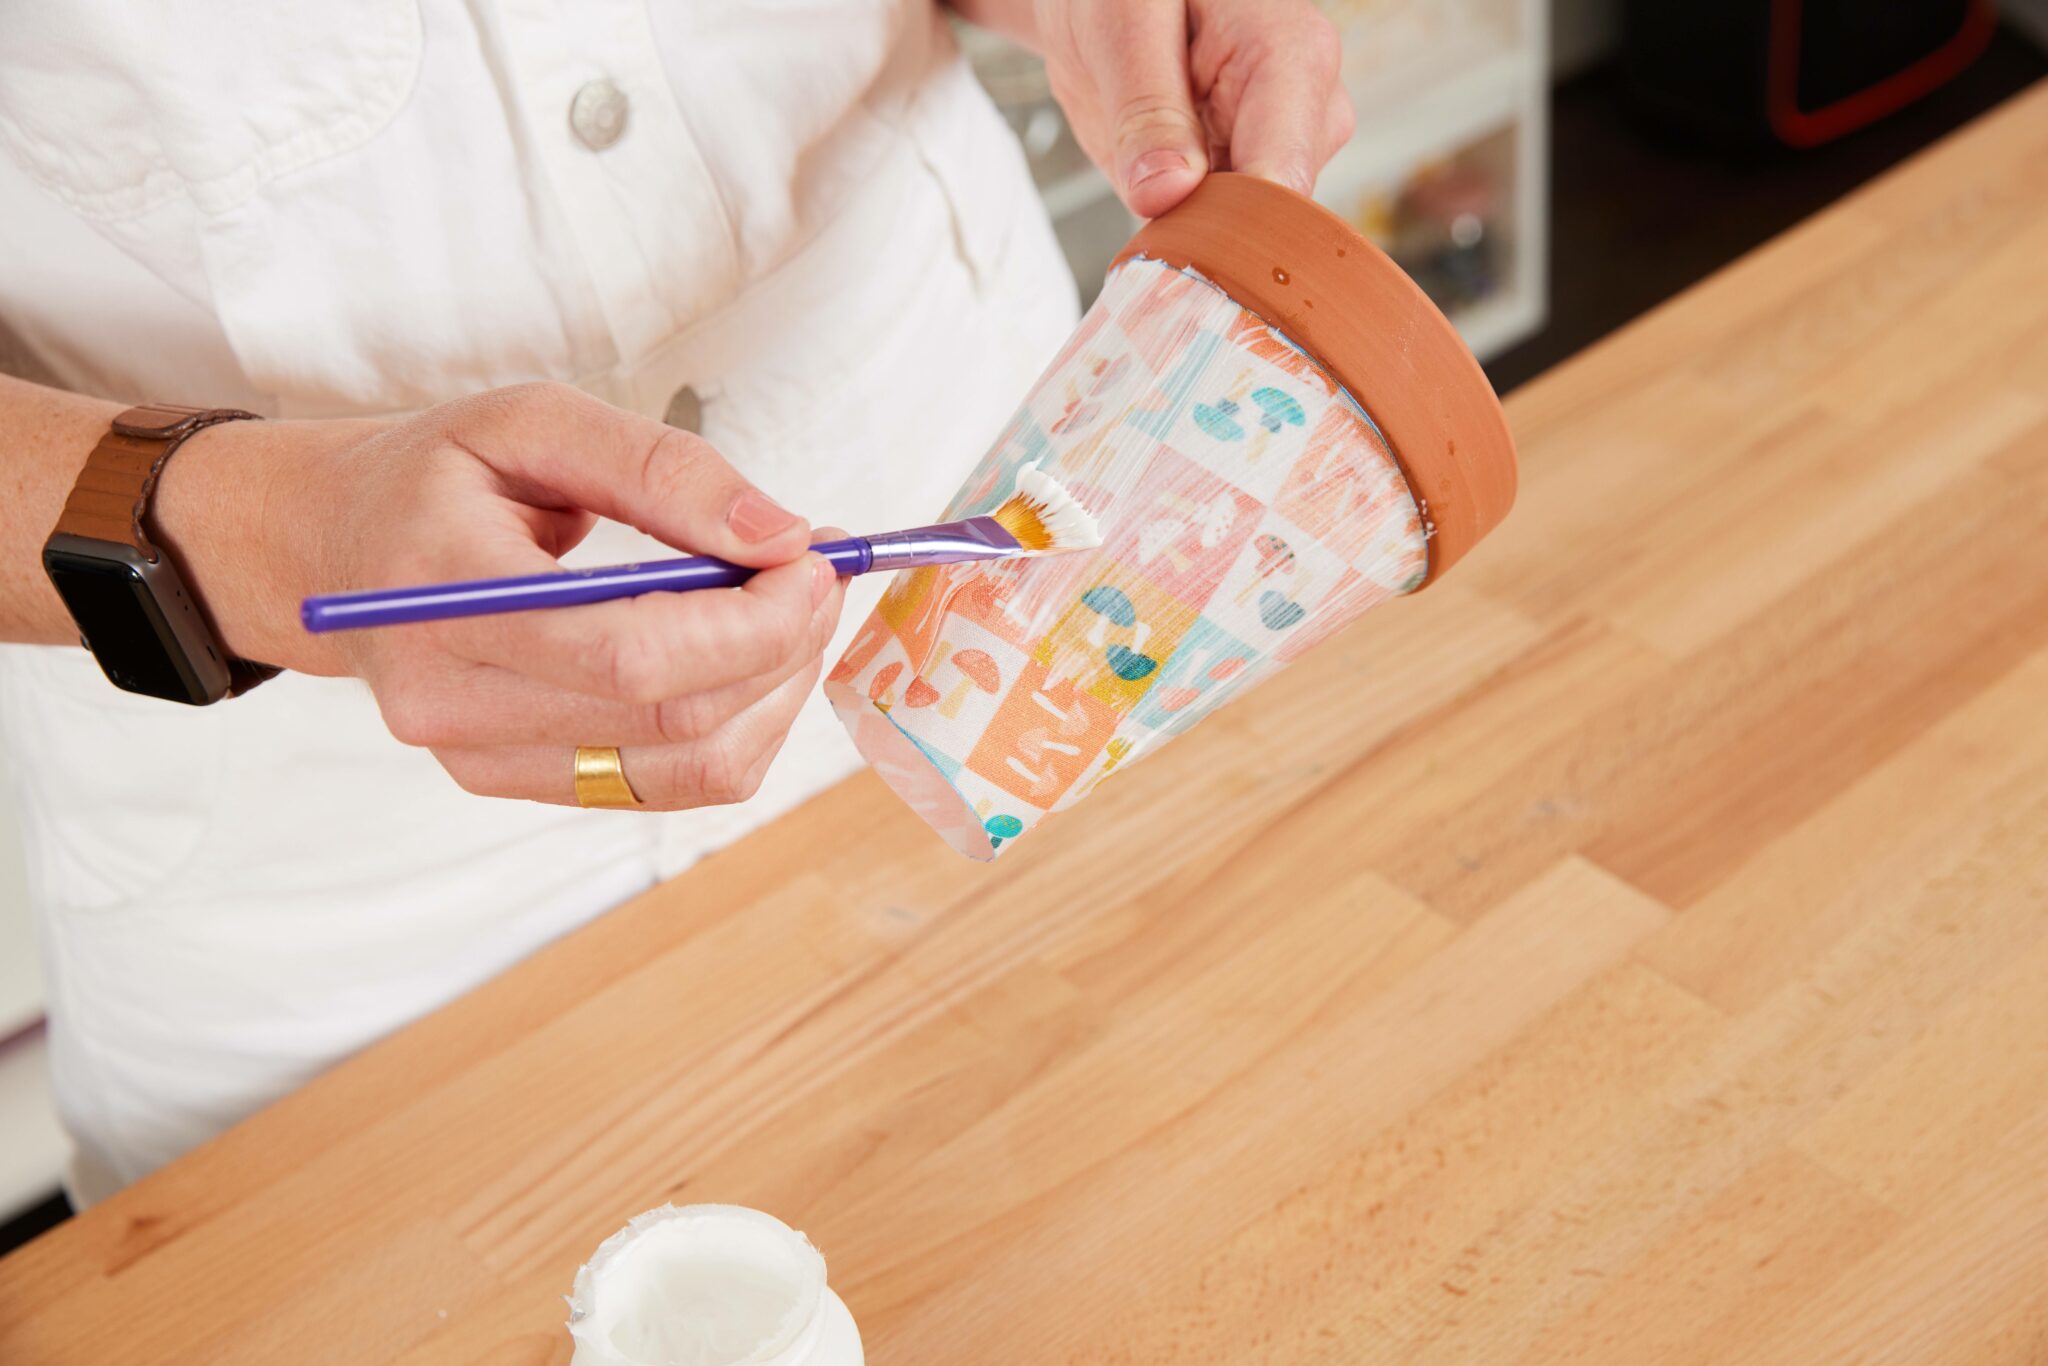
    Using a paintbrush, Alexa paints the flower pot covered with fabric featuring small squares of small mushrooms in blue, white, green and peach with Mod Podge Outdoor.
    Using a paintbrush, Alexa paints the flower pot covered with fabric featuring small squares of small mushrooms in blue, white, green and peach with Mod Podge Outdoor.

    Step 10. Cover the bottom with Mod Podge Outdoor and fold down excess fabric

    Using your paintbrush, apply Mod Podge Outdoor to the bottom of the pot and fold down the excess, all the way around. Note: you’ll want to ensure that the excess fabric doesn’t cover the drainage hole on the bottom of the pot. If it does, you’ll want to trim it before securing it with Mod Podge Outdoor.
    Using a paintbrush, Alexa paints the bottom of the terracotta flower pot covered with fabric featuring small squares of small mushrooms in blue, white, green and peach with Mod Podge Outdoor.
    Using a paintbrush, Alexa paints the bottom of the terracotta flower pot covered with fabric featuring small squares of small mushrooms in blue, white, green and peach with Mod Podge Outdoor.
    Alexa folds down the excess fabric over the bottom of the terracotta flower pot covered with fabric featuring small squares of small mushrooms in blue, white, green and peach.
    Alexa folds down the excess fabric over the bottom of the terracotta flower pot covered with fabric featuring small squares of small mushrooms in blue, white, green and peach.

    Step 11. Let it dry and you’re done!

    Lastly, allow the Mod Podge Outdoor to dry completely and pot a plant of your choice inside!
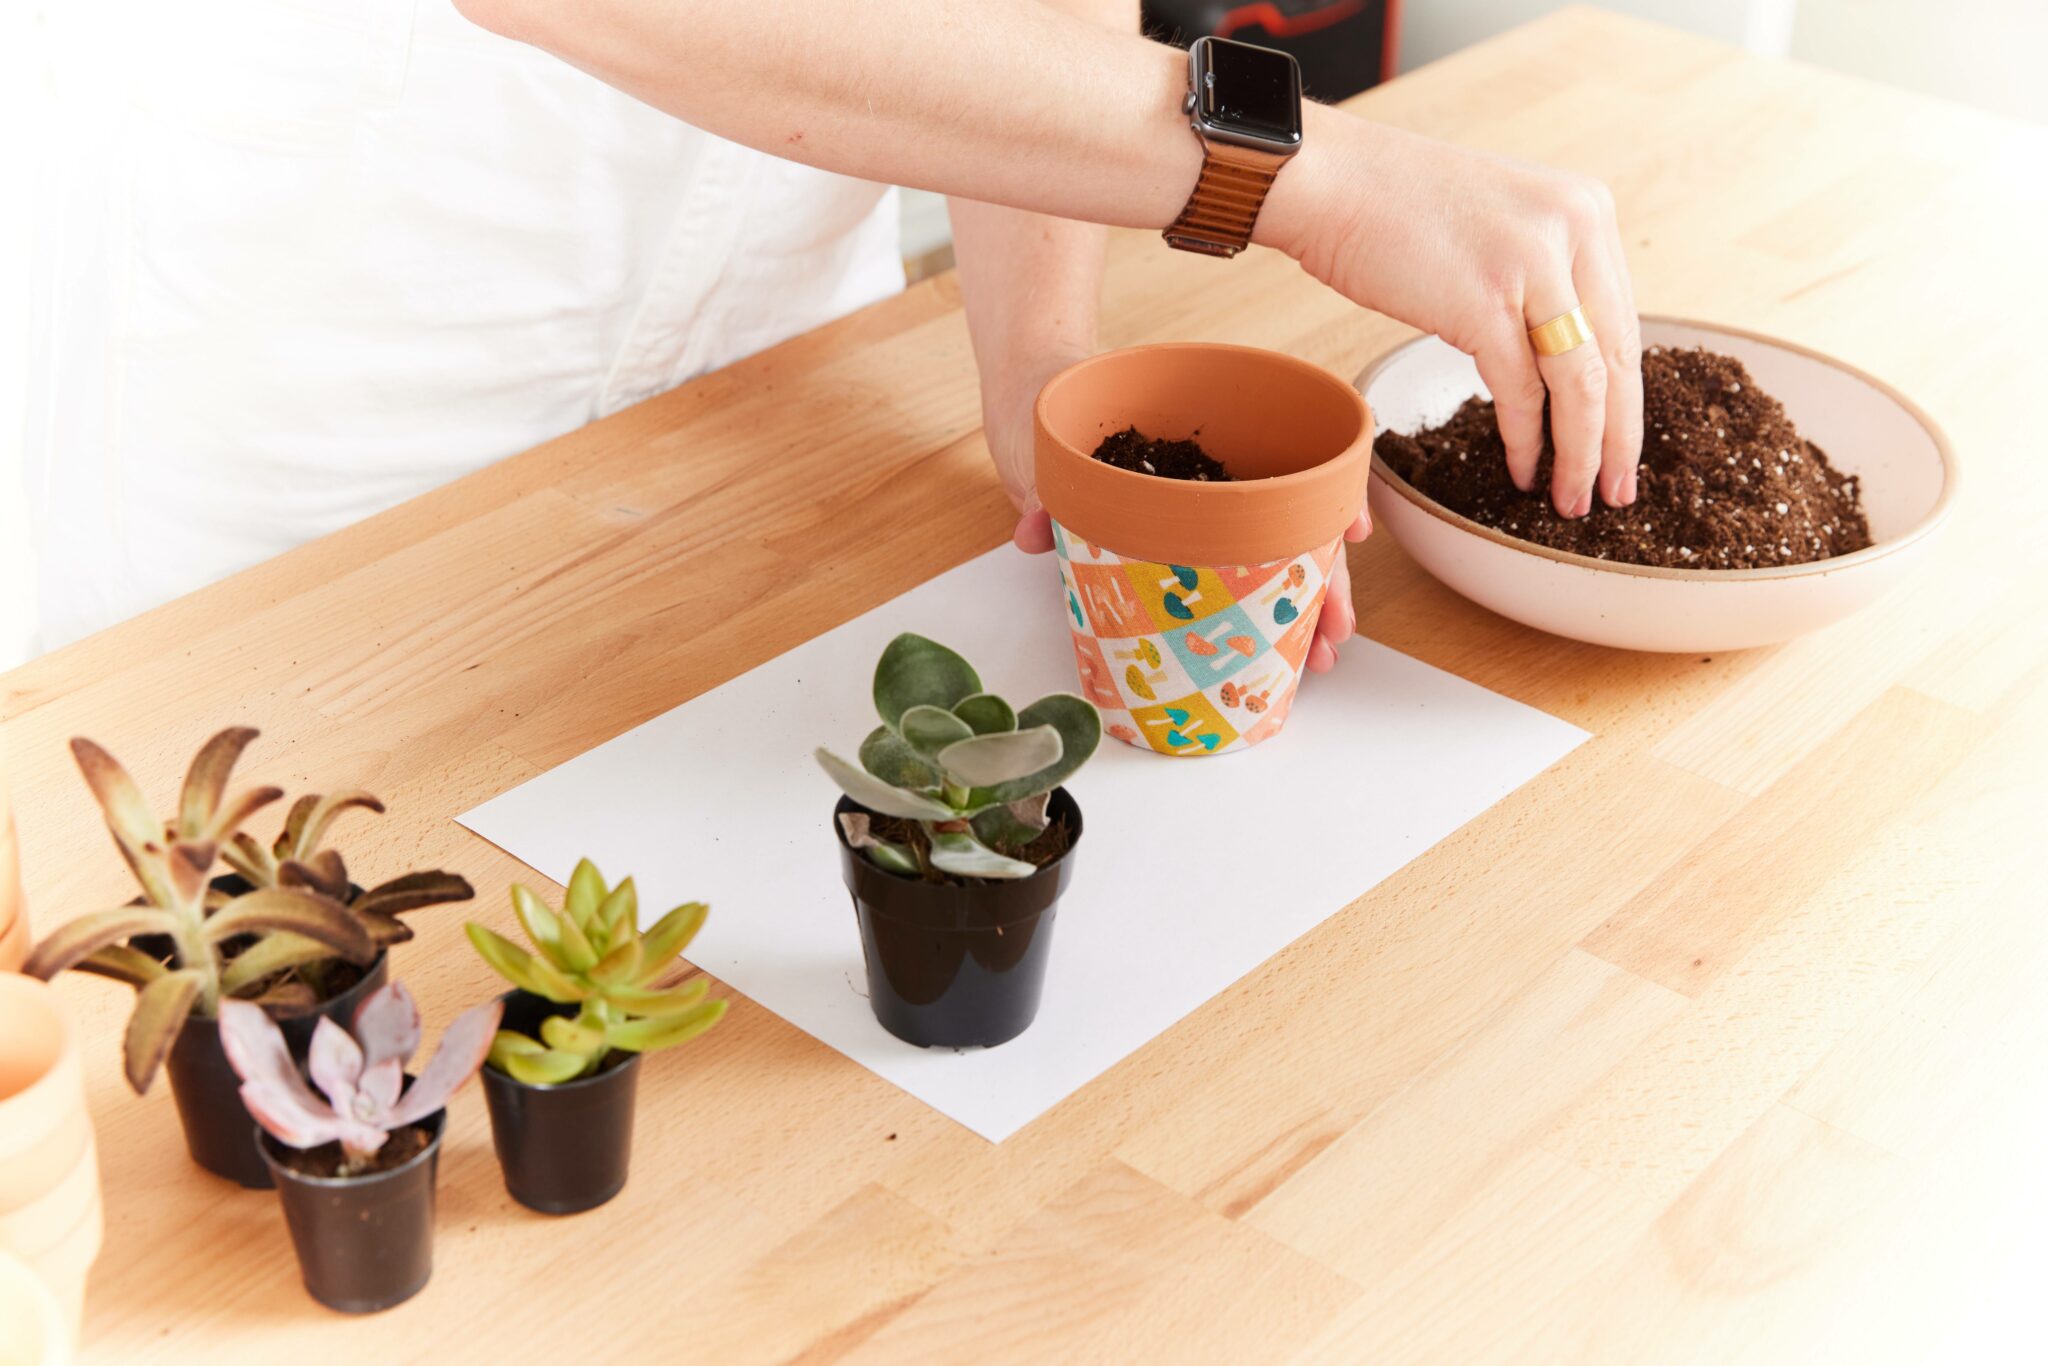
    Alexa adds soil to the fully dried terracotta flower pot covered with fabric featuring small squares of small mushrooms in blue, white, green and peach.
    Alexa adds soil to the fully dried terracotta flower pot covered with fabric featuring small squares of small mushrooms in blue, white, green and peach.

    **Where can I show off my finished flower pot? **
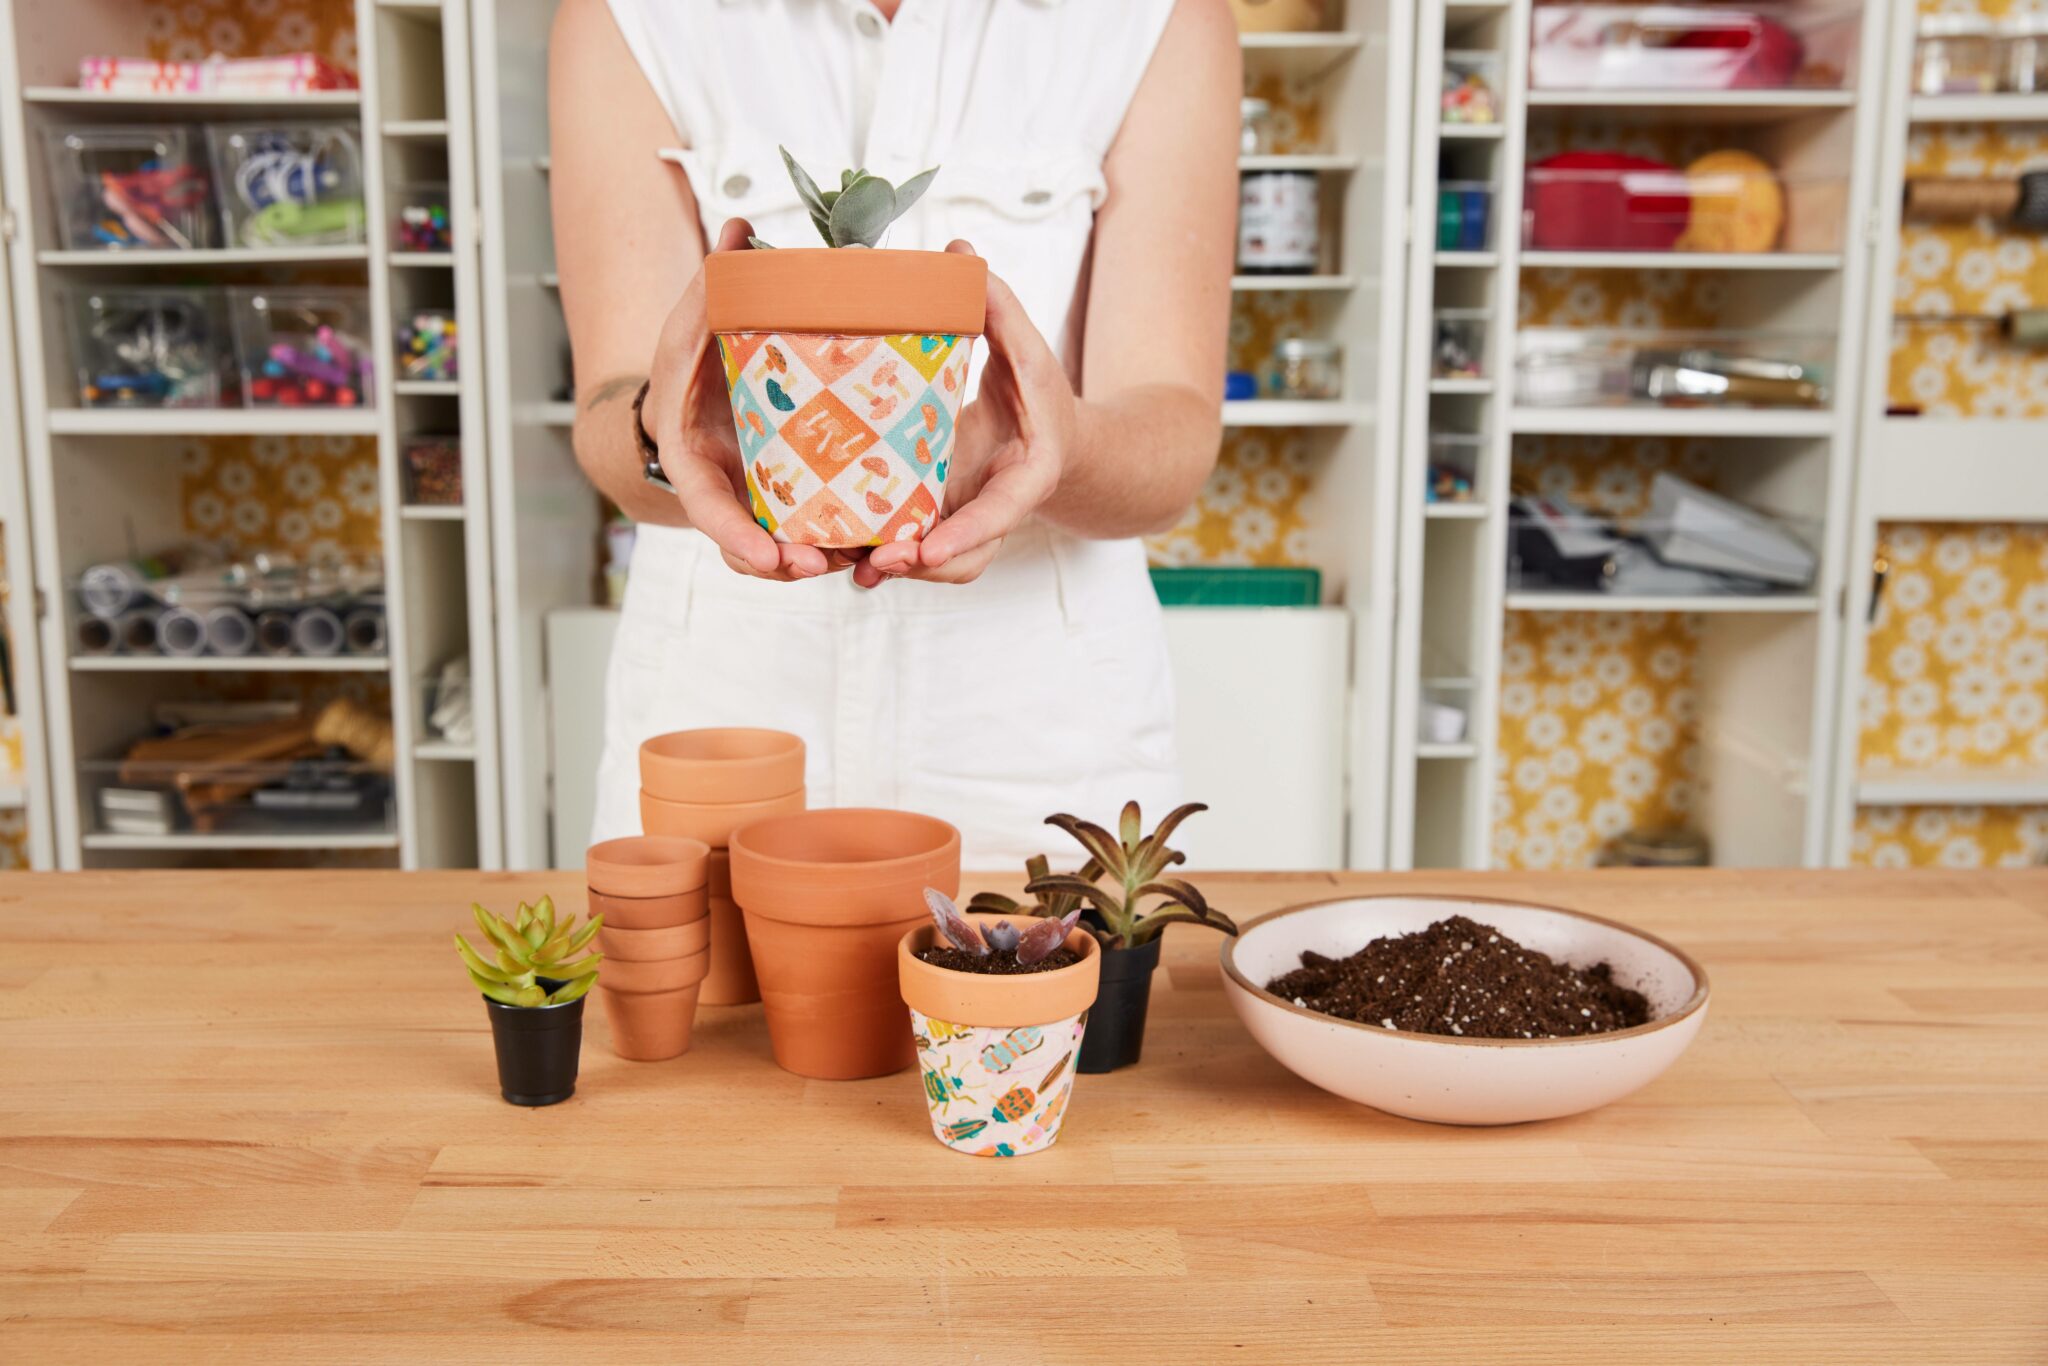
    A small succulent has been planted in a fully dried terracotta flower pot covered with fabric featuring small squares of small mushrooms in blue, white, green and peach. Alexa is holding up the finished project for the camera. Several other succulents, te
    A small succulent has been planted in a fully dried terracotta flower pot covered with fabric featuring small squares of small mushrooms in blue, white, green and peach. Alexa is holding up the finished project for the camera. Several other succulents, te
    Don’t forget to show off your creation to your world and ours by tagging @spoonflower on your social media!

    How to Create Your Own Fabric-Covered Flower Pot Template

    Don’t have easy access to a printer? Or using a pot that differs in size from those noted in our printable template? Follow these steps to create your own template at home!

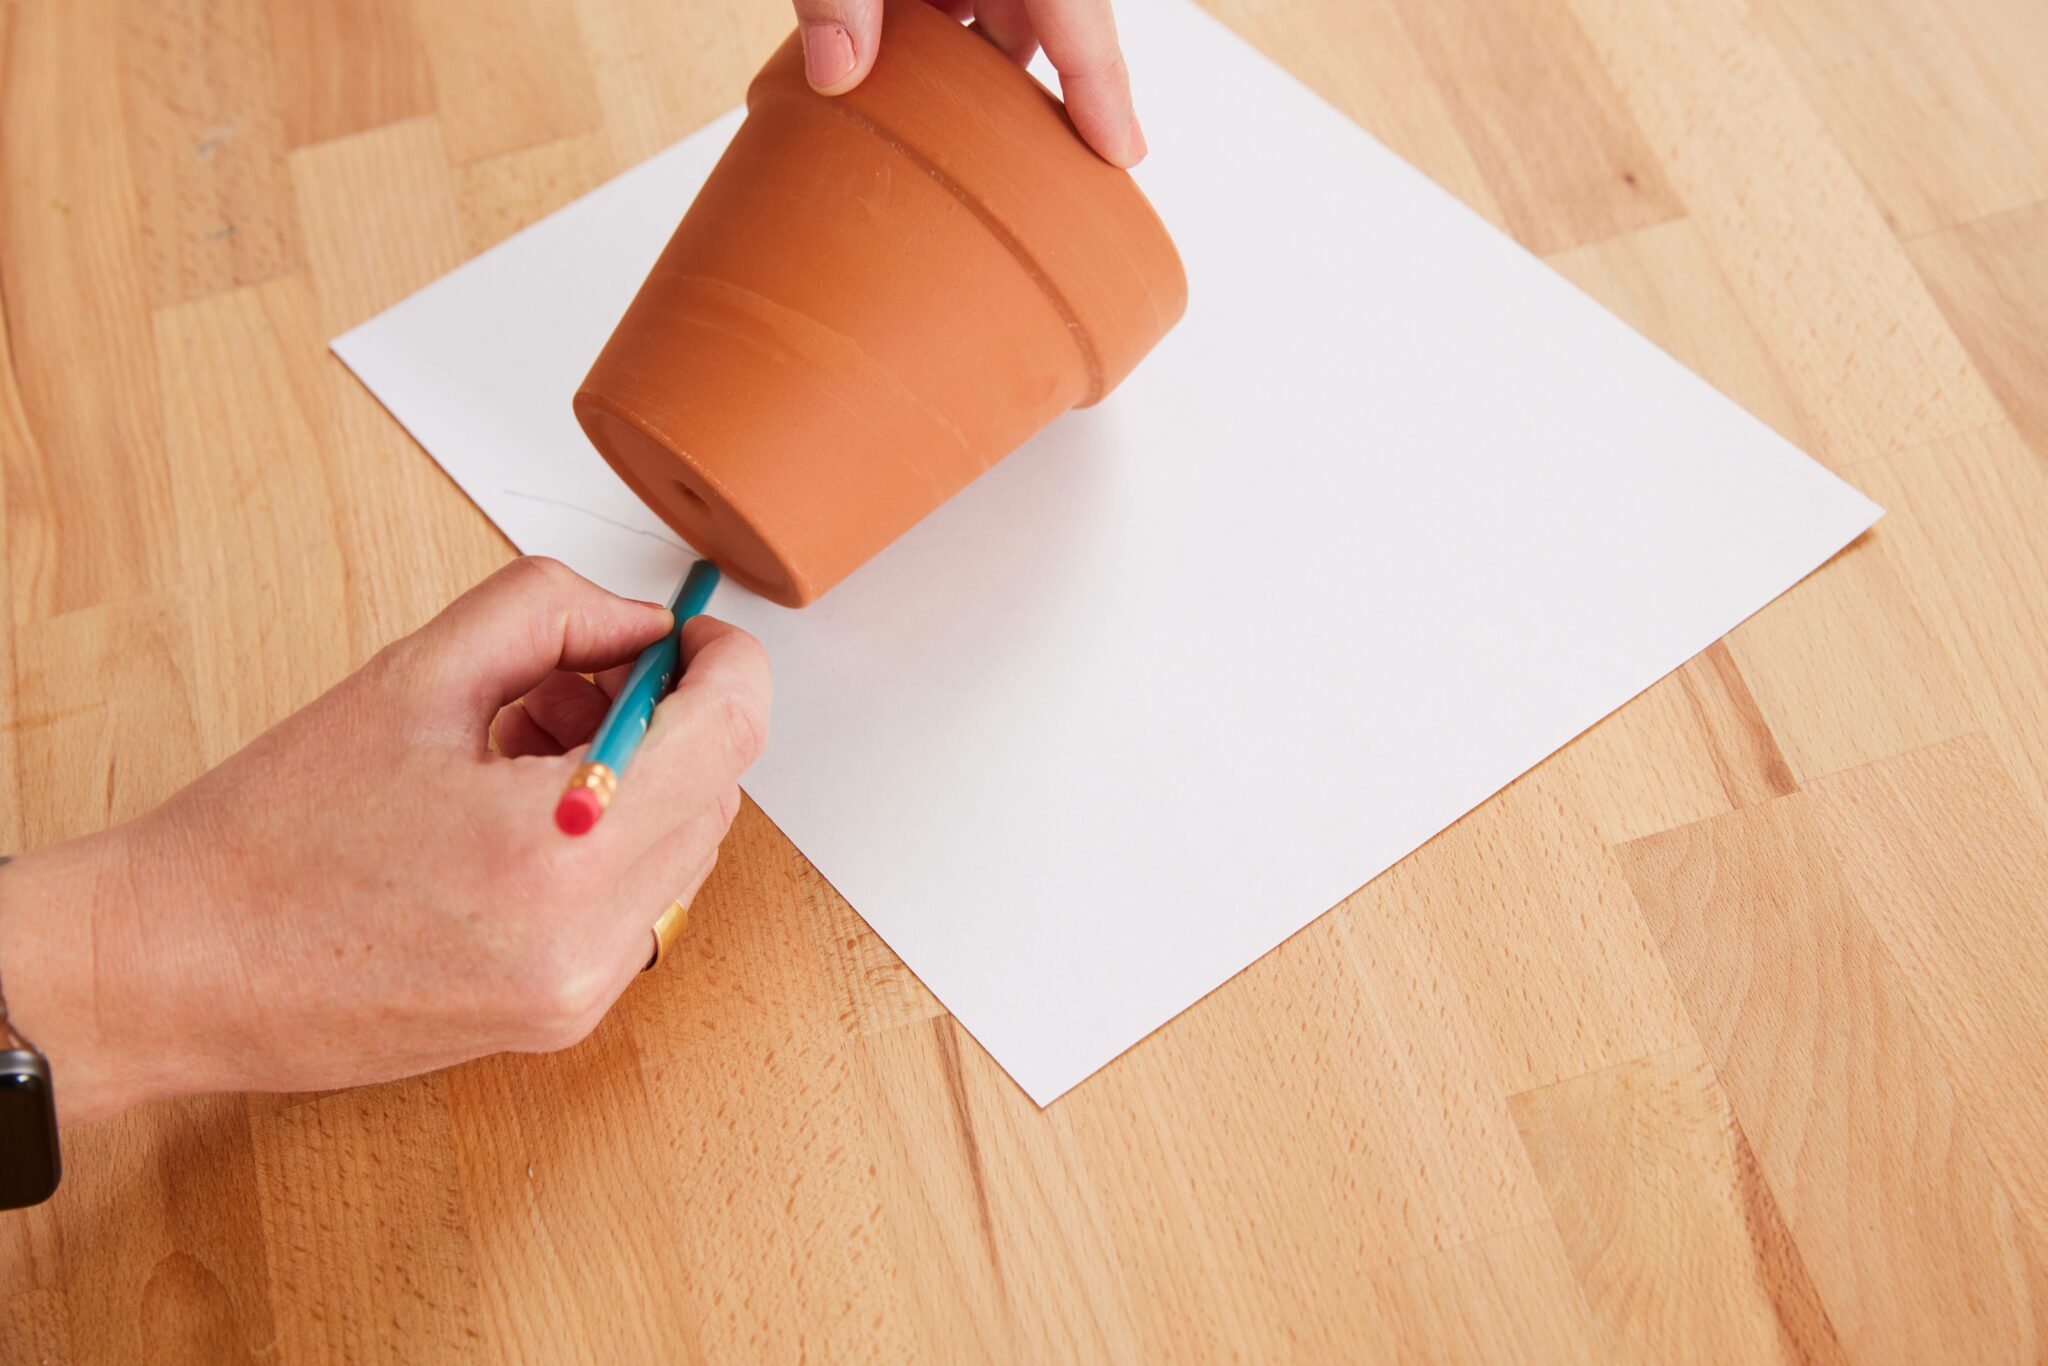
    Step 1. With your flower pot in the bottom lefthand corner of your paper, roll it across the paper, tracing the arc as you go

    Lay out a sheet of paper or cardstock on your work surface. Take your terracotta flower pot and place it down in one corner of a sheet of paper. Take a pencil and set it on the lowest edge of the pot. Now roll the pot all the way to the other corner of the paper, tracing with your pencil as you go. This will create the bottom edge of your paper template.
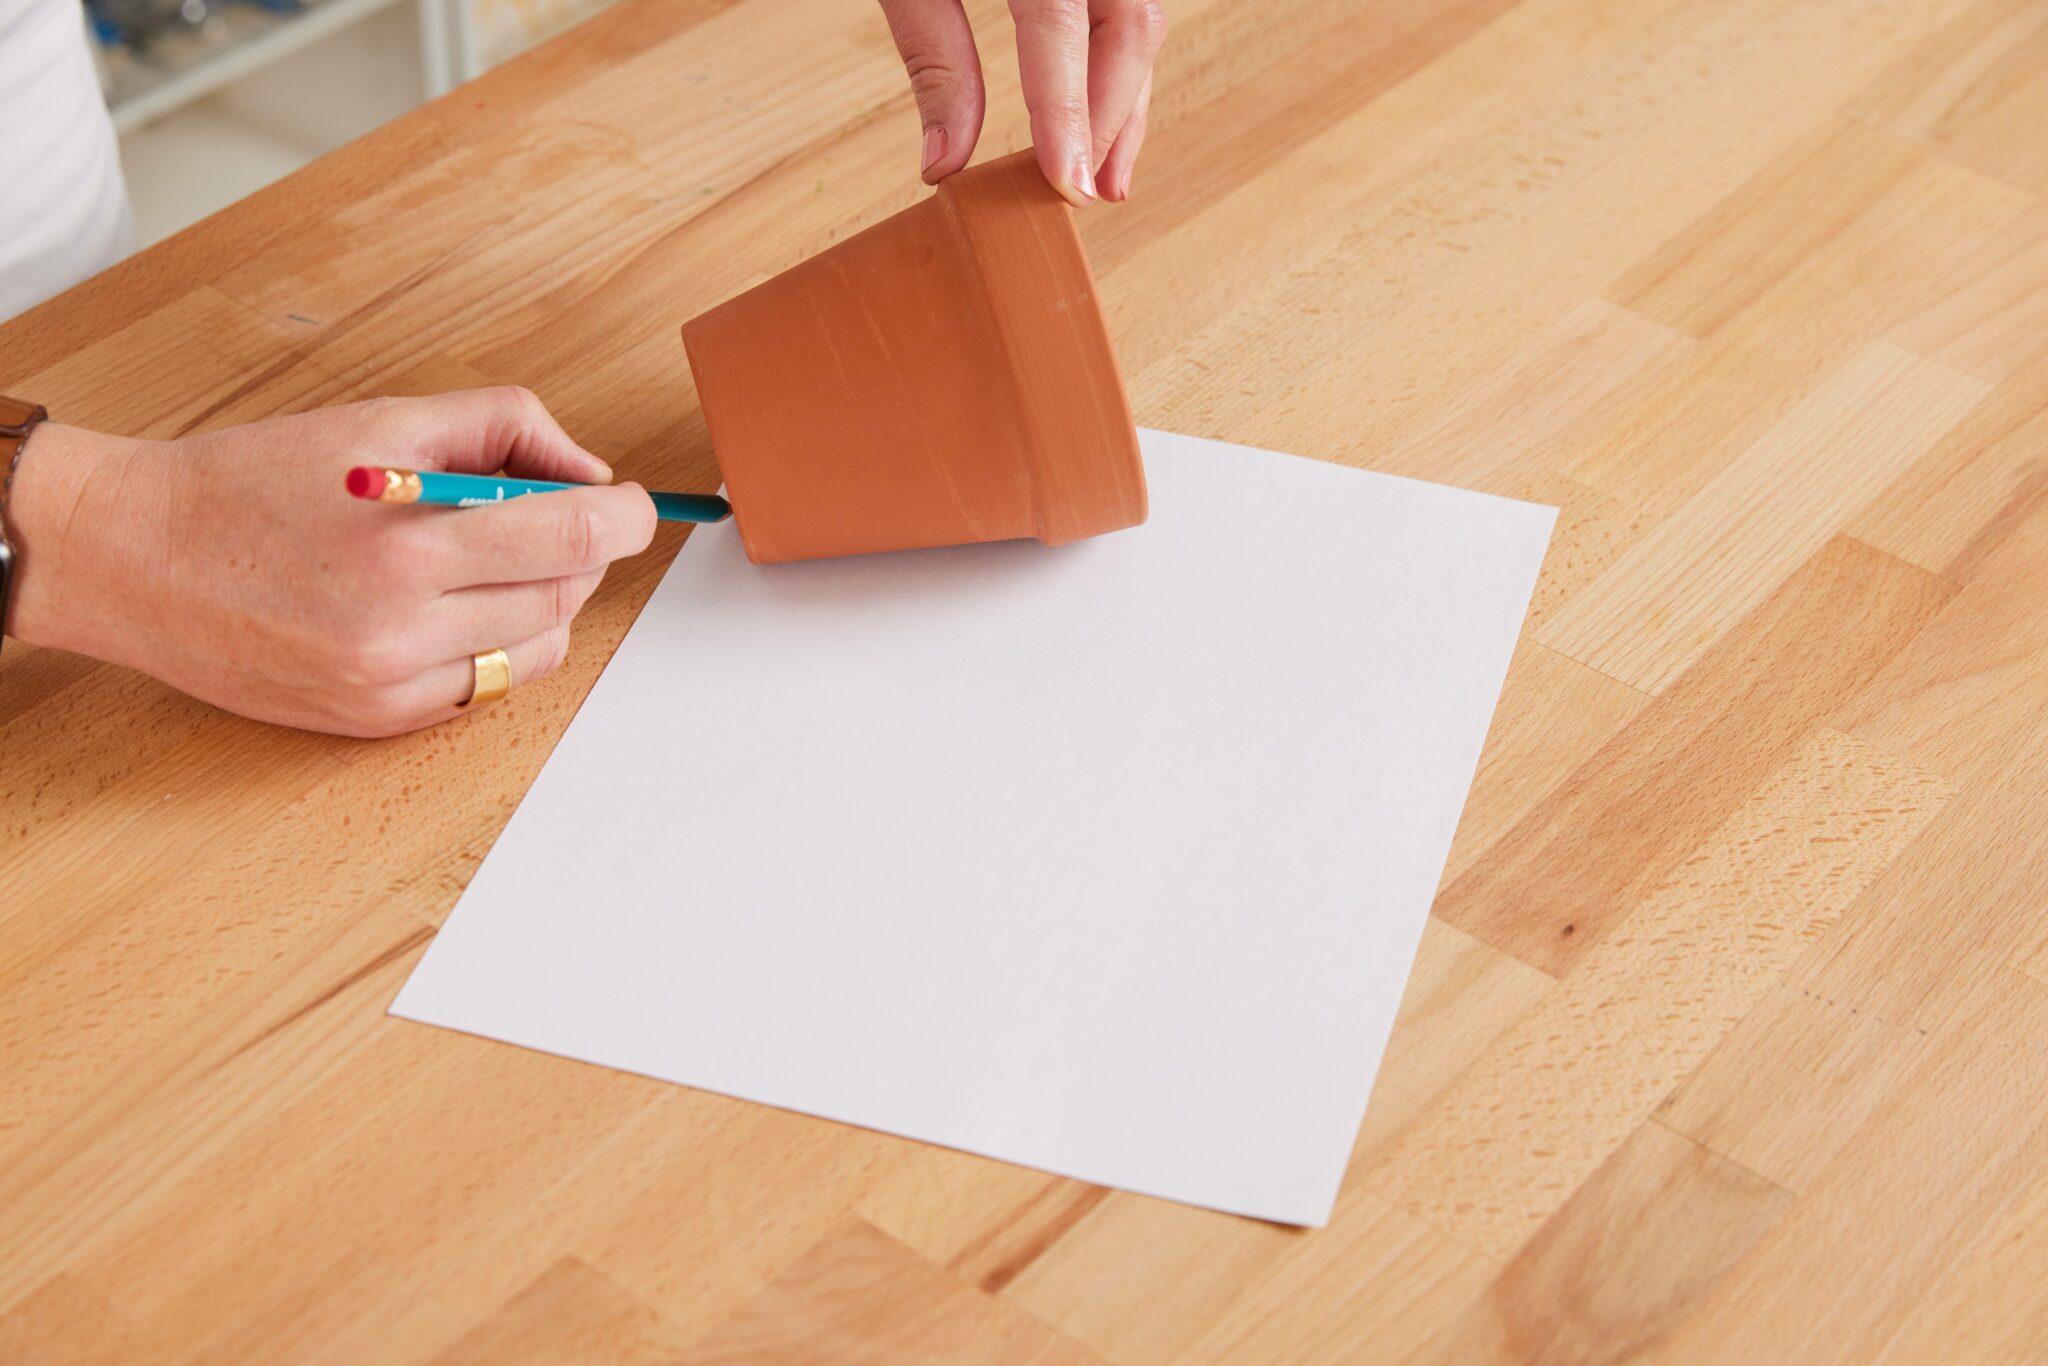
    Alexa uses a pencil and a piece of paper to create a paper template for her fabric-covered flower pot. She is just starting the process of drawing the template. The bottom edge of the flower pot is touching the bottom left edge of the piece of paper. The
    Alexa uses a pencil and a piece of paper to create a paper template for her fabric-covered flower pot. She is just starting the process of drawing the template. The bottom edge of the flower pot is touching the bottom left edge of the piece of paper. The
    Alexa uses a pencil and a piece of paper to create a paper template for her fabric-covered flower pot. She is rolling the surface of the flower pot lengthwise across the paper. As she moves to the right, this creates an arc-like shape to be used as a temp
    Alexa uses a pencil and a piece of paper to create a paper template for her fabric-covered flower pot. She is rolling the surface of the flower pot lengthwise across the paper. As she moves to the right, this creates an arc-like shape to be used as a temp

    **Step 2. Continue rolling the flower pot across the paper and tracing the arc **

    Now that you’re in the opposite corner of the sheet of paper, place your pencil on the upper edge of the pot. Roll the pot back to the starting point, tracing with your pencil as you go. This will create the top edge of your paper template. When you remove your pot from the paper, you should be left with an arc-shaped template that has both a top and bottom.
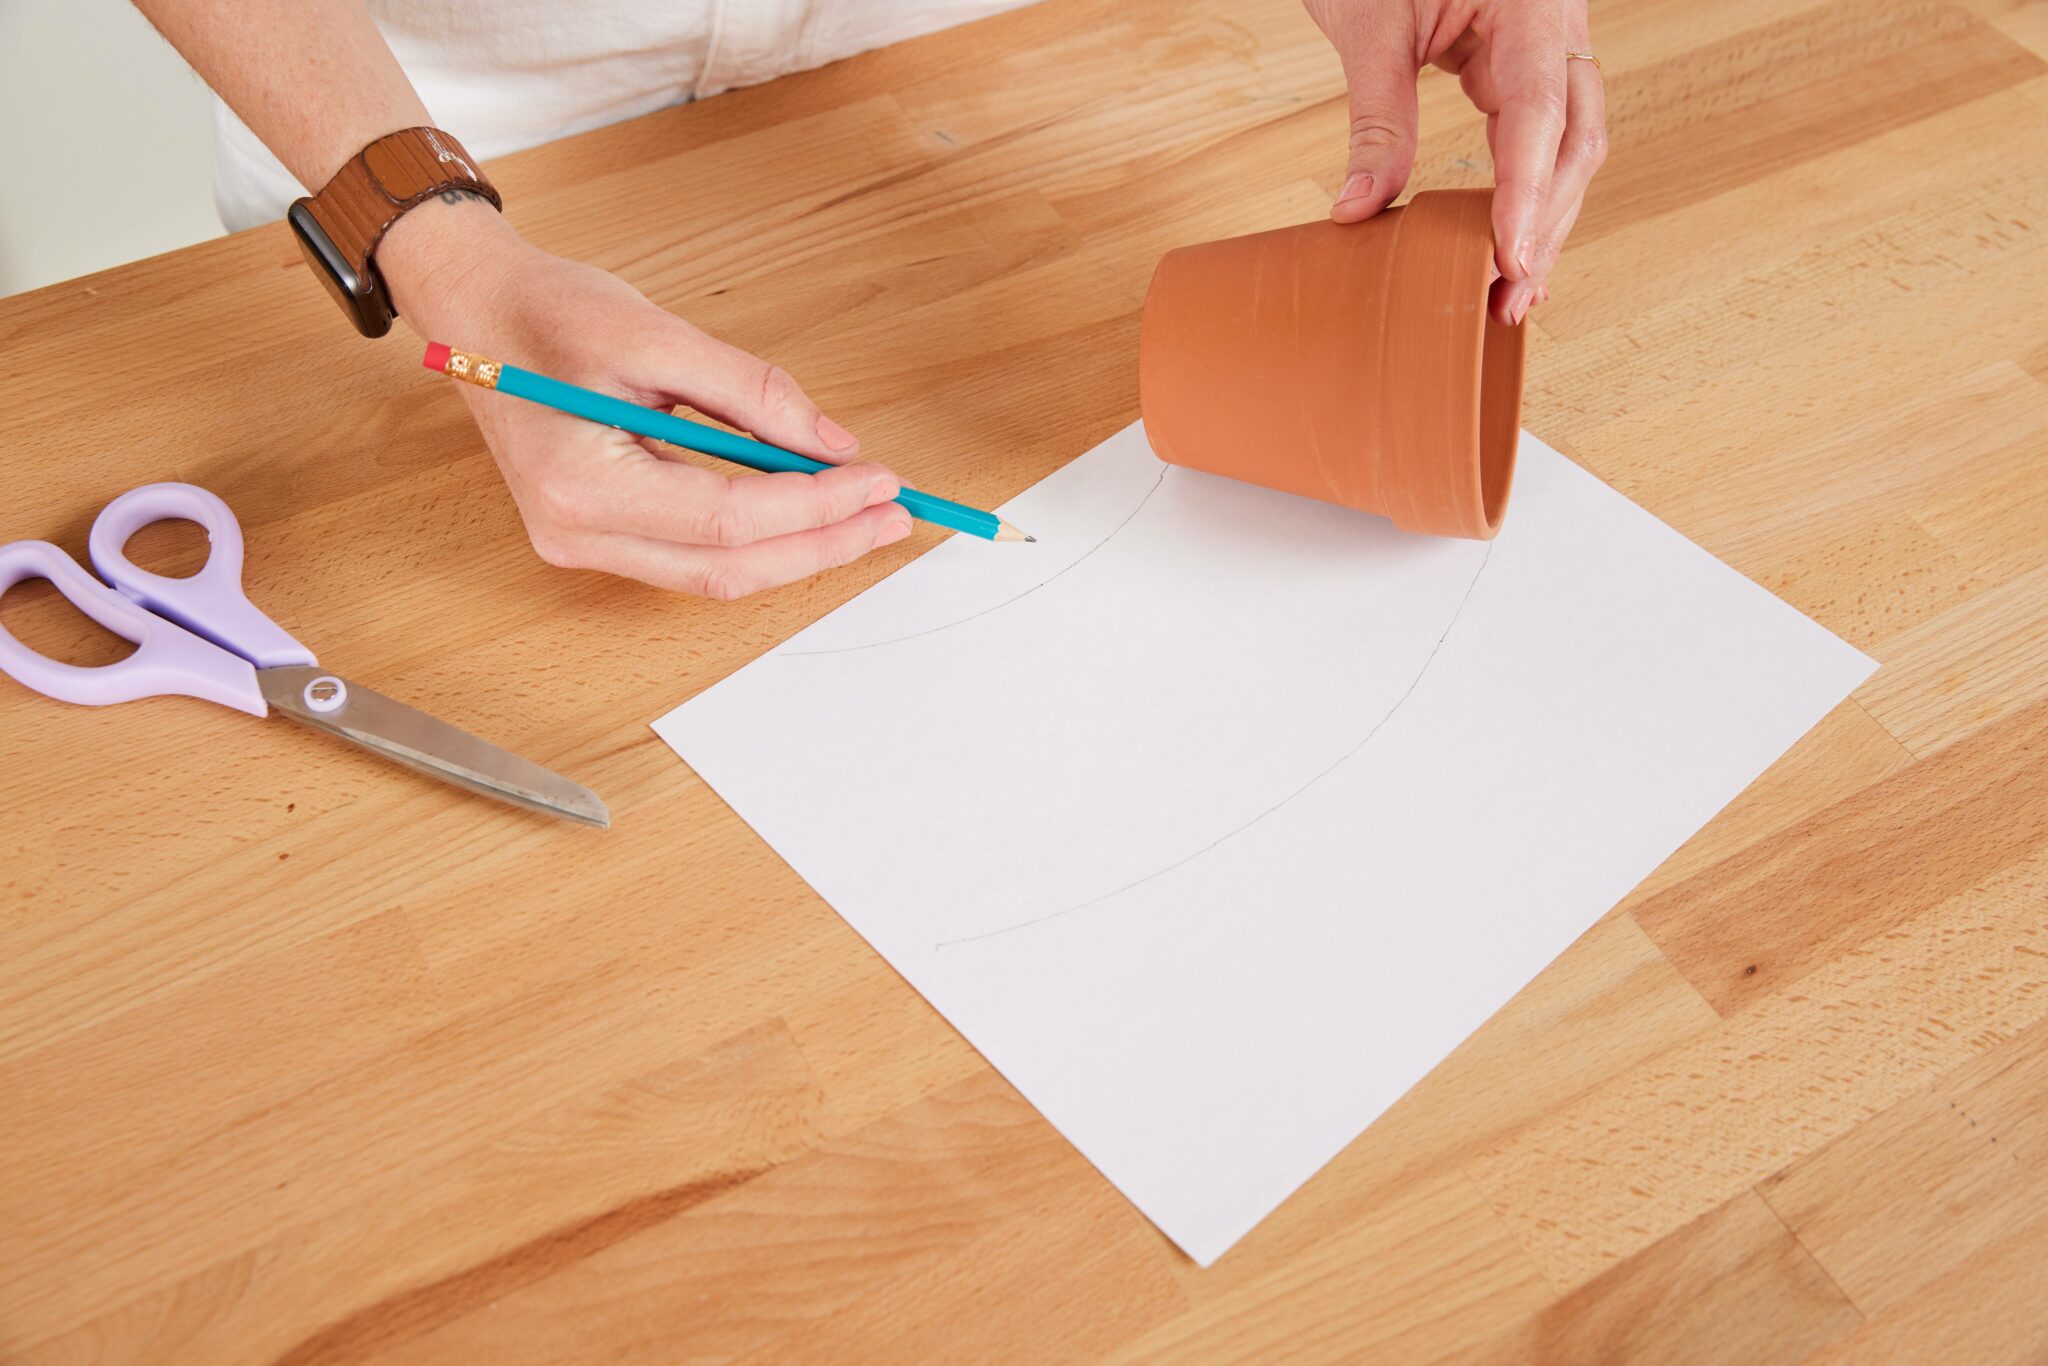
    Alexa uses a pencil and a piece of paper to create a paper template for her fabric-covered flower pot. She has rolled the surface of the flower pot lengthwise across the paper from left to right, tracing the edge of the flower pot as she goes. 
    Alexa uses a pencil and a piece of paper to create a paper template for her fabric-covered flower pot. She has rolled the surface of the flower pot lengthwise across the paper from left to right, tracing the edge of the flower pot as she goes. 

    **Step 3. Cut out your paper template **

    Cut out the template and go back to step 3 above to wrap it around the pot to ensure it will cover the pot all the way around. When you do so, just make sure that the excess fabric on the bottom doesn’t hang down too low.
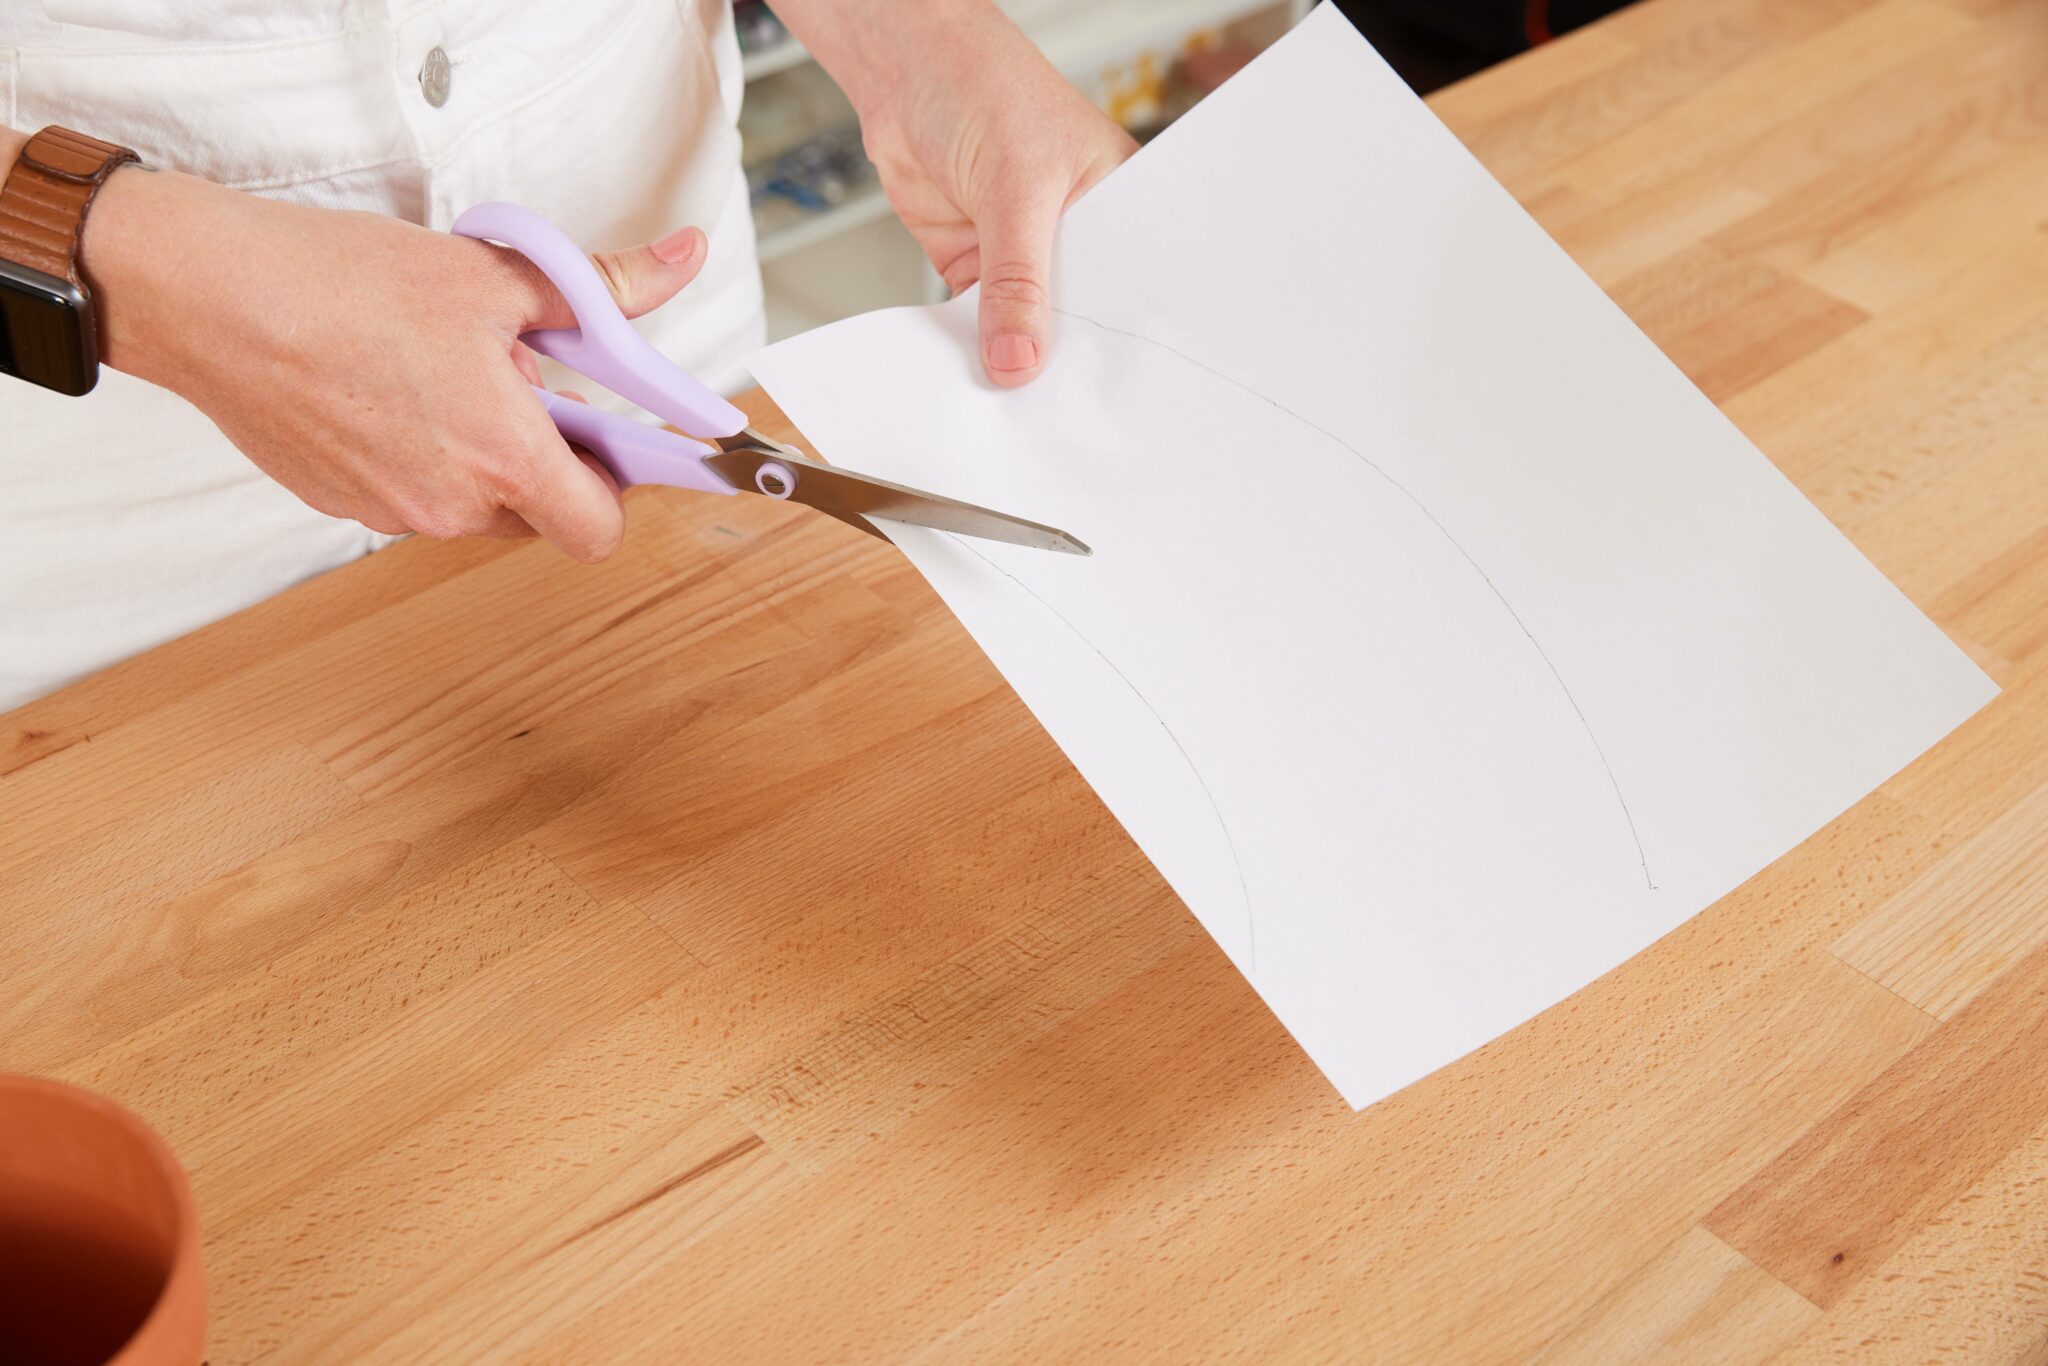
    Alexa begins to cut out the paper template which has been traced onto a piece of paper.
    Alexa begins to cut out the paper template which has been traced onto a piece of paper.

    Frequently Asked Questions

    How do you cover a flower pot with fabric?

    For this project, you’ll be wrapping the fabric around the flower pot on top of wet Mod Podge Outdoor. You’ll also be applying another coat of Mod Podge Outdoor on top of the fabric you wrapped around the pot.

    What fabric can be used to cover flower pots?

    We’re using Petal Signature Cotton®, but you can also use other sturdy woven fabrics. As we’ll be using glue, we don’t recommend knit fabrics for this project.* *

    Where can I place my fabric-covered flower pot?

    For this tutorial, we’re using Mod Podge Outdoor, which is water resistant, not waterproof. Therefore, we recommend either placing fabric-covered flower pots indoors or outdoors in a covered setting. * *

    How can I make my fabric-covered flower pots waterproof?

    To make your flower pot waterproof, we recommend painting the pot’s inside and outside with sealer and letting it completely dry before painting the pot with Mod Podge Outdoor.

    Want more kid-friendly projects?

    WHY SPOONFLOWER?

    Made to order using unique designs from artists worldwide.