
How to Make a Gift Box with Wallpaper
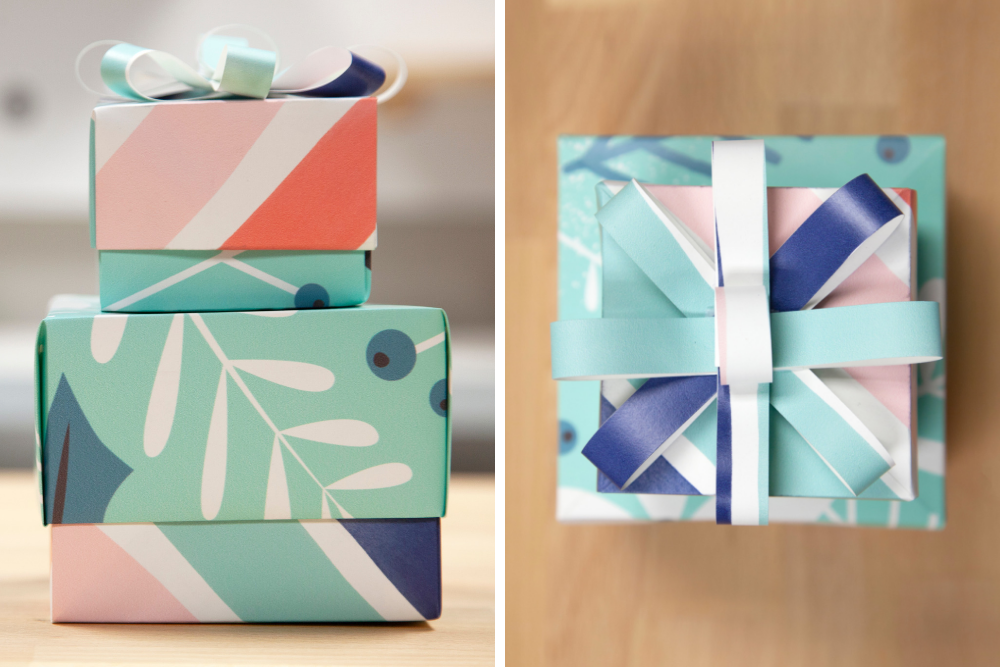
After a year of filling your home with beautiful Spoonflower wallpaper projects, you’re probably left with a stack of leftover wallpaper samples. End the year beautifully, and sustainably, by using the remaining wallpaper samples to make elevated gift boxes that match your style. Follow our step-by-step instructions to learn how to make a gift box with wallpaper and ditch the tape and excess wrapping paper this season!
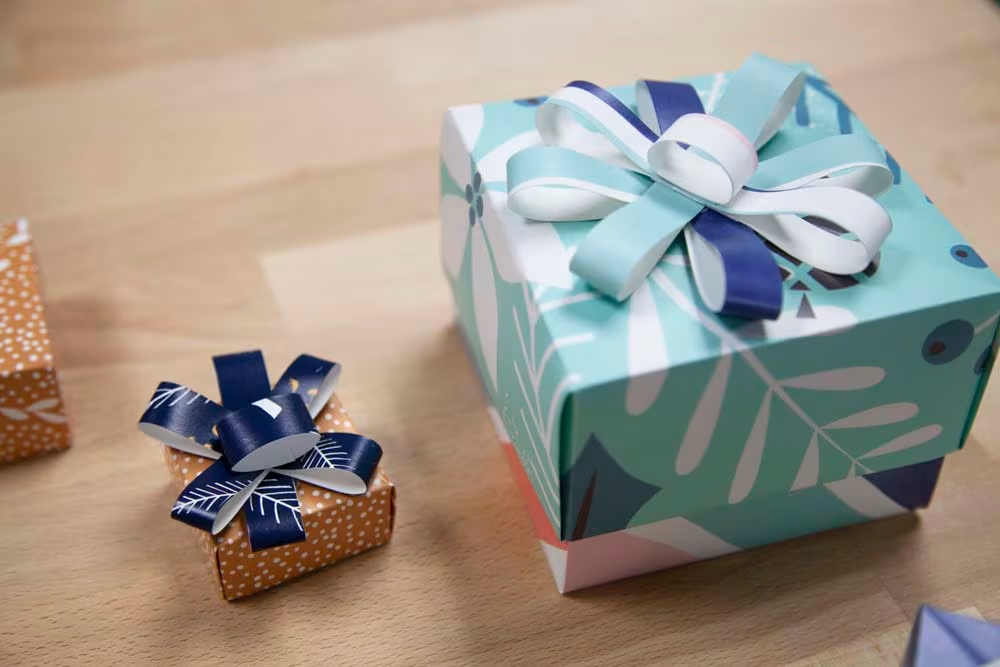
Materials to Make a Gift Box
- 1 leftover 24″ x 12″ Spoonflower wallpaper swatch
- Pencil
- Scissors
- Scissors or X-Acto knife
Steps to Make a Gift Box with Wallpaper
Step 1: Cut Out Squares
To make your gift box, you’ll need two square pieces of paper. To make sure the top fits nicely over the bottom, your bottom piece needs to be at least 1/2″ smaller than the top piece. If your paper isn’t square, use a ruler to measure out a square, mark with a pencil and cut with scissors or an X-Acto knife. Your box can be any size you’d like, but for this tutorial we’re using paper that is 12″ for the top and 11.5″ for the bottom which will give us a finished box measuring 4″.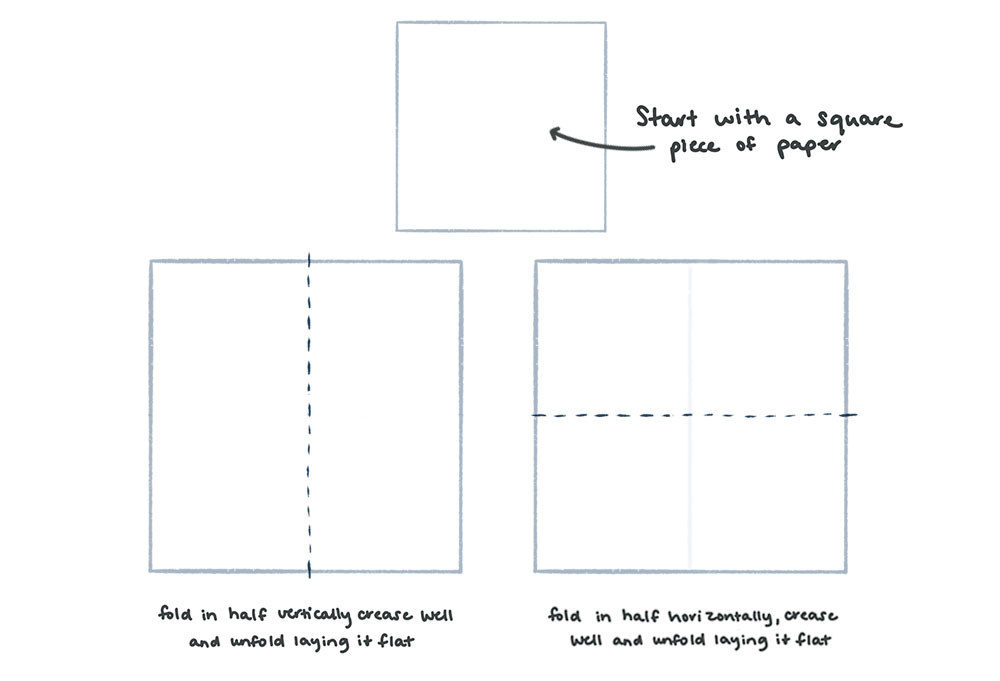
Step 2: Fold the Paper Squares in Half
Starting with your smaller square piece (the bottom of the box) fold it in half vertically pressing down the fold to crease it well. Unfold and lay flat. Now fold your paper horizontally also being sure to crease it well. Once both folds are done unfold the paper again and lay it flat. Repeat for the second piece of paper. Pro Tip: Use your nails or a credit card to push down along the folds and make extra crisp creases.Step 3: Fold Your Paper into a Diamond
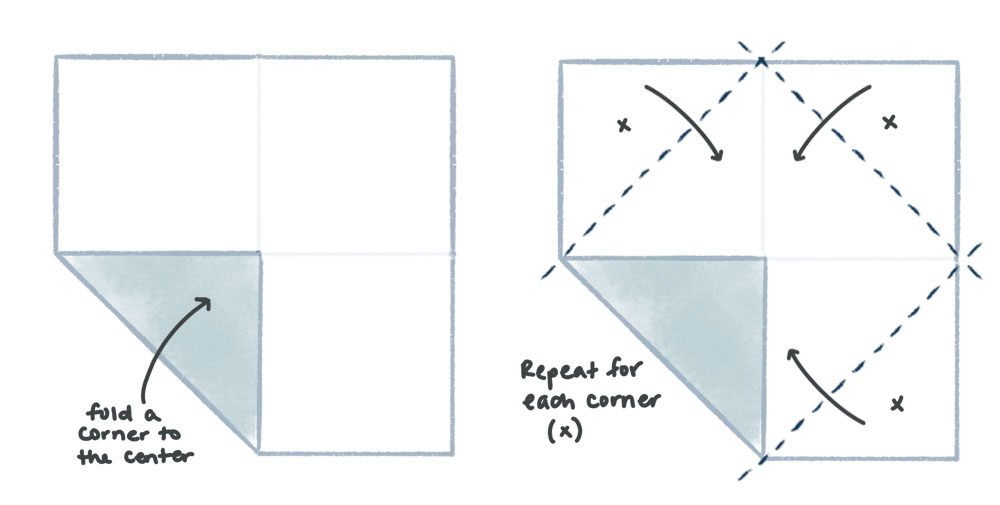
Step 4: Make Top and Bottom Creases

Step 5: Turn Your Paper Square into a Rectangle

Step 6: Create an L with Your Paper
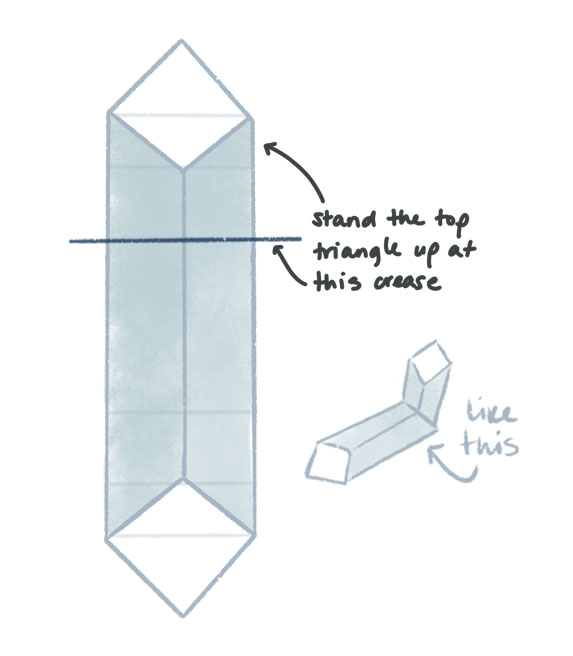
Step 7: Unfold the Edges
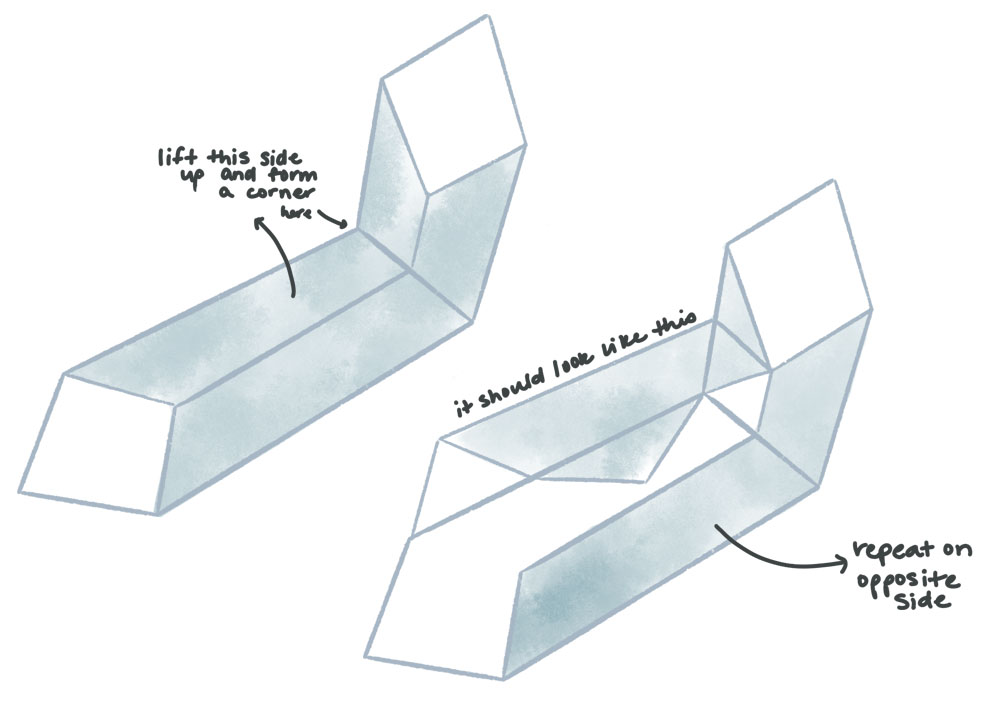
Step 8: Finish Your Gift Box

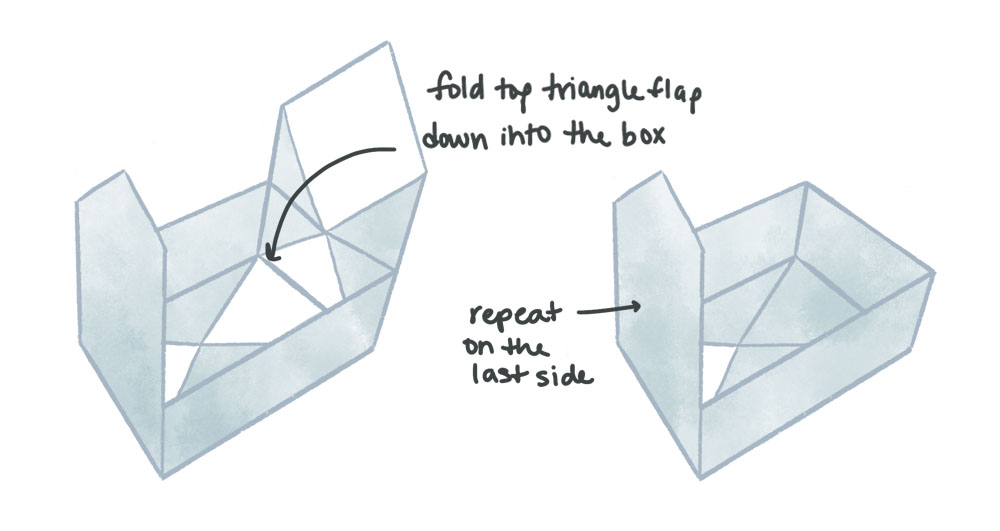
How to Make A Gift Wrap Bow
Follow these steps to make a gift wrap bow to top your wallpaper gift box! Check out our YouTube video for more DIY gift wrap add-ons.

No wallpaper? No problem!
Made to order using unique designs from artists worldwide.
The World’s Largest Design Library for Wallpaper and Textiles
Discover a world of design—from minimalist to maximalist. Thousands of global artists, with new styles added constantly.
Custom Designs on Any Item
Our made-to-order model lets you print any design on any material. Coordinate patterns across rooms for a cohesive, personalized home.
Premium Materials, Always in Stock
Trusted by pros and enthusiasts, our responsibly sourced textiles and papers offer the perfect finish—from smooth to textured, delicate to durable.
Printed on Demand in the USA
Our print-on-demand model lets you choose your design, material, and quantity—minimizing waste with non-toxic inks and reduced packaging.