
DIY Chiffon Ballet Wrap Skirt
Spoonflower’s Chiffon fabric is making its center stage DIY debut today with the help of Ceri Staziker. This blousy and ultra-sheer fabric is a dream for projects that require a material with a light touch and beautiful drape. Follow along as Ceri shows how to make a gorgeous DIY Chiffon ballet wrap skirt using our free PDF pattern. Whether you are making this for yourself or your child, you’ll be twirling in style thanks to this custom Chiffon ballet wrap skirt for under $25.

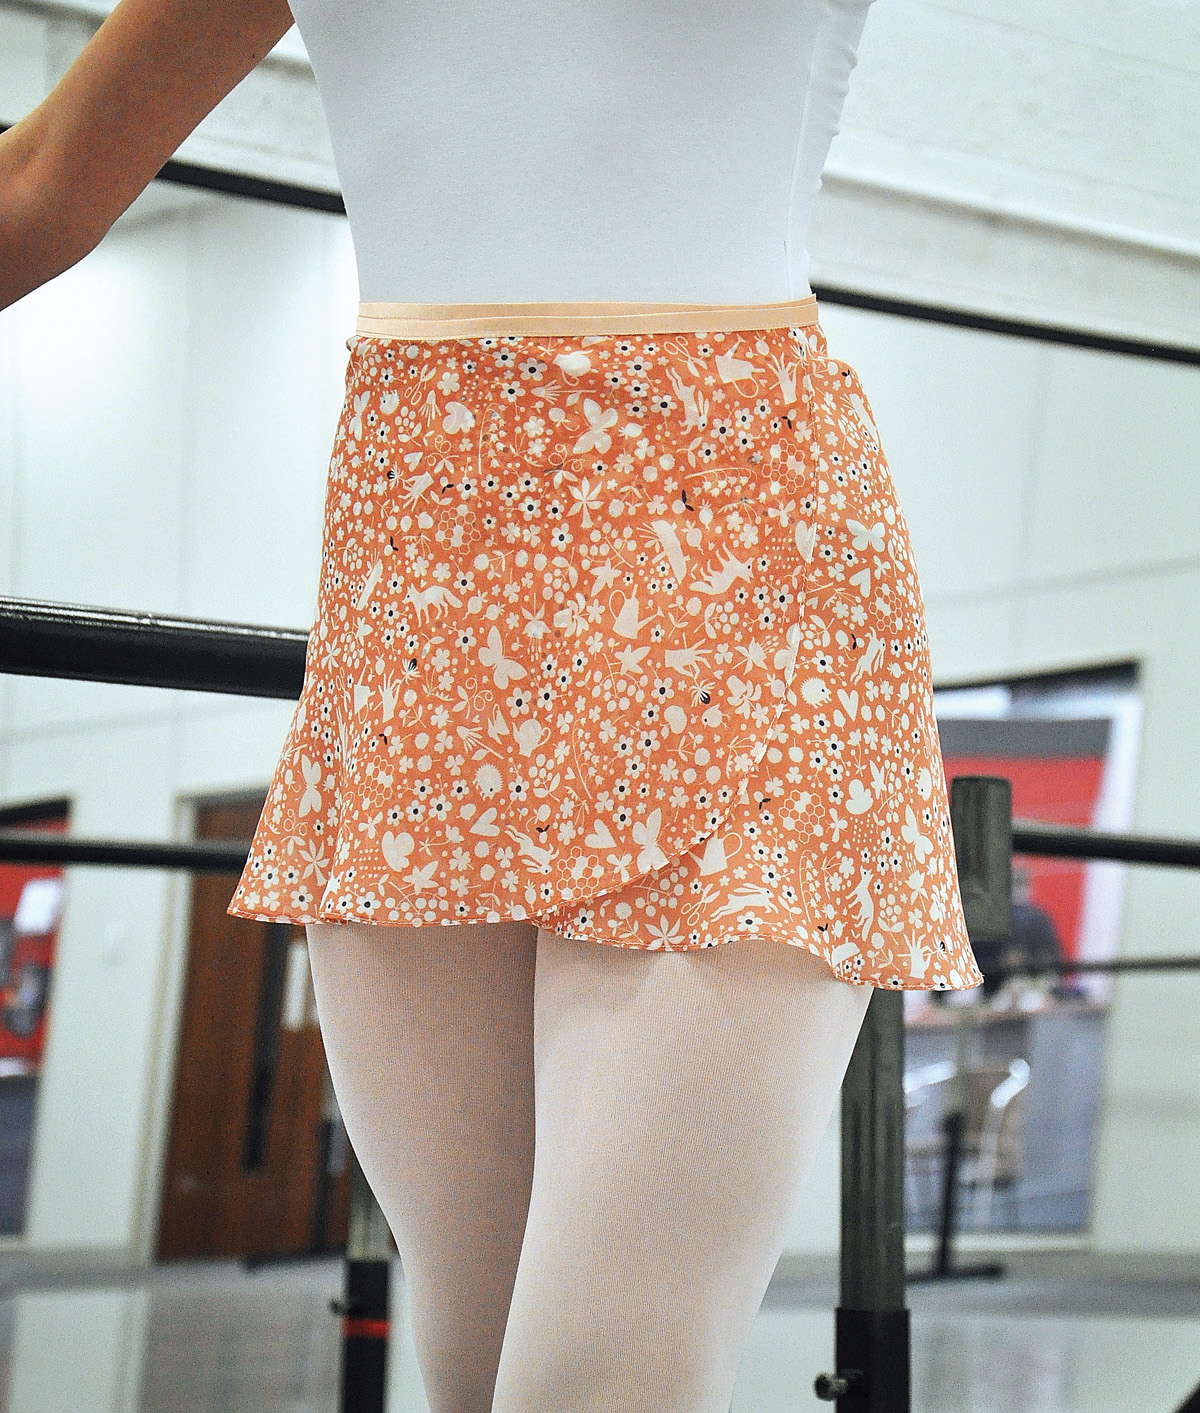
Materials to Make a Chiffon Ballet Skirt
- 1 yard of Chiffon – I’m using my Ditsy Flora and Fauna
- 2.5 yards of satin bias binding
- Sewing machine
- Coordinating thread
- Rolled hem foot (optional)

Steps to Sew a Chiffon Ballet Skirt
Step 1: Print Out the Free PDF Pattern
Print out and tape together your PDF Ballet Skirt pattern.Step 2: Cut Out The Pattern Pieces
Trace the pattern pieces and cut them out of the Chiffon fabric.
Step 3: Make a Narrow Double-Fold on the Long Edge and Finger-Press It
With fine fabrics like Chiffon, one of the neatest way to do this is with a rolled hem. A rolled hem is a very narrow double-folded hem. Many sewing machines have a special foot which will sew a rolled hem for you, but if you don’t have one, YouTube is a great resource for tutorials on how to sew one by hand. The hand-sewn method will be more time-consuming but you will get a beautiful result. Alternatively you could serge your hem. Again, YouTube is a great reference if you need guidance for serging with sheer fabrics. Make a narrow double-fold at the starting edge and finger-press it.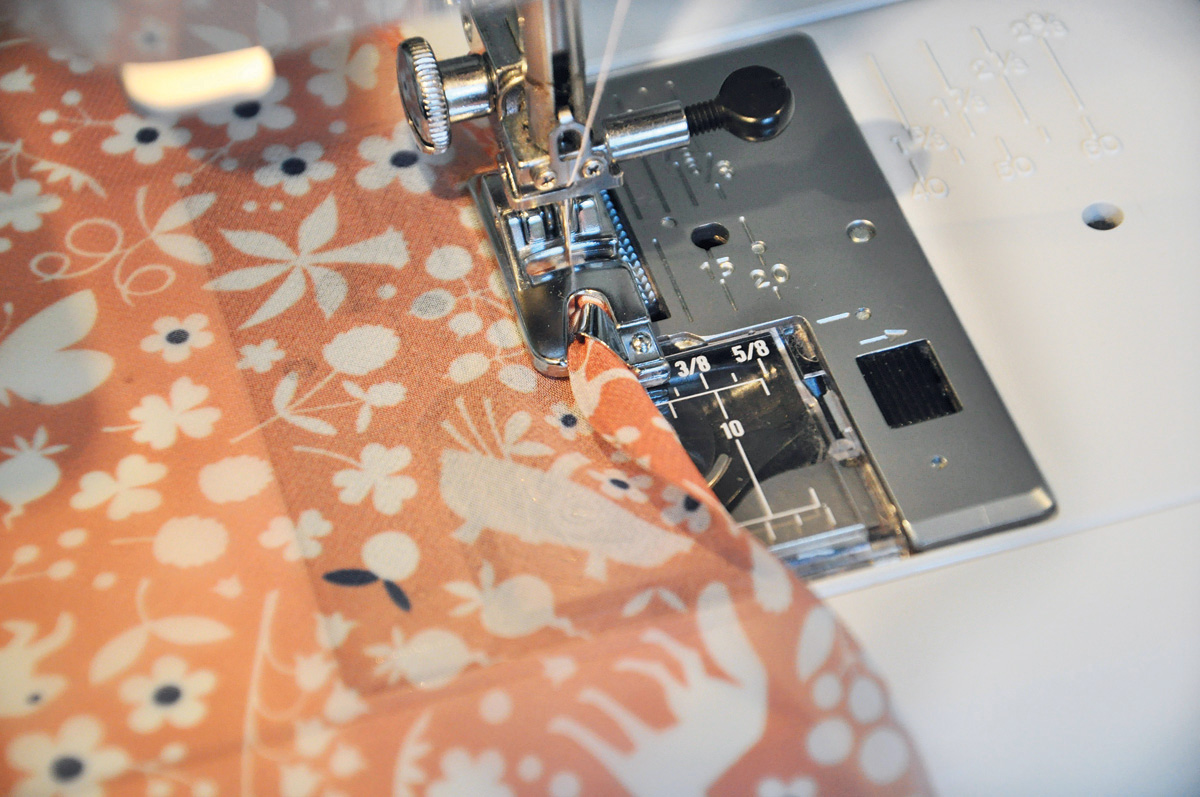
Step 4: Sew a Hem along the Long Edge
It’s a little more fiddly to use a rolled hem foot with sheer fabrics, so its a good idea to practice first on a scrap. Place the finger-pressed edge under your rolled hem foot and stitch a few stitches to get started. Then, hook the edge of the fabric around the curve of the foot and continue stitching. Take it slowly and steadily, guiding the fabric as you go. When you’re confident, go ahead and sew the rolled hem on your skirt. It should look like this the photograph below. Protect the Chiffon with a cloth then press the hem with a warm iron. Do not use a hot iron!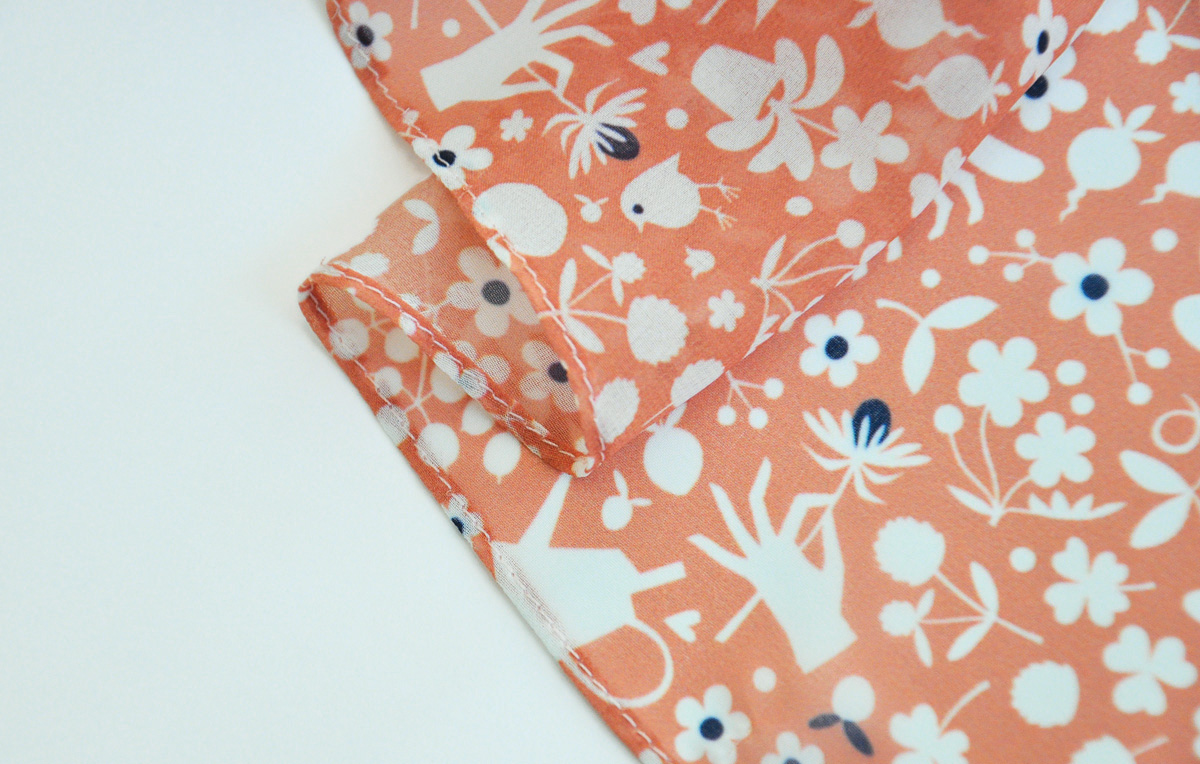
Step 5: Attach the Satin Bias Binding to the Waist Edge
Find the centre of the waist edge of the skirt by folding the fabric in half and marking the centre point with a pin. Do the same with the bias binding. Match the center of the waist with the center of the binding. With right sides together, starting at the centre point, pin the (unfolded) bias binding to the skirt, working outwards in both directions. The bias binding will extend further than the waist edge as it will eventually form the ties. Don’t worry about this yet, just pin the binding as far as the edges of the waist.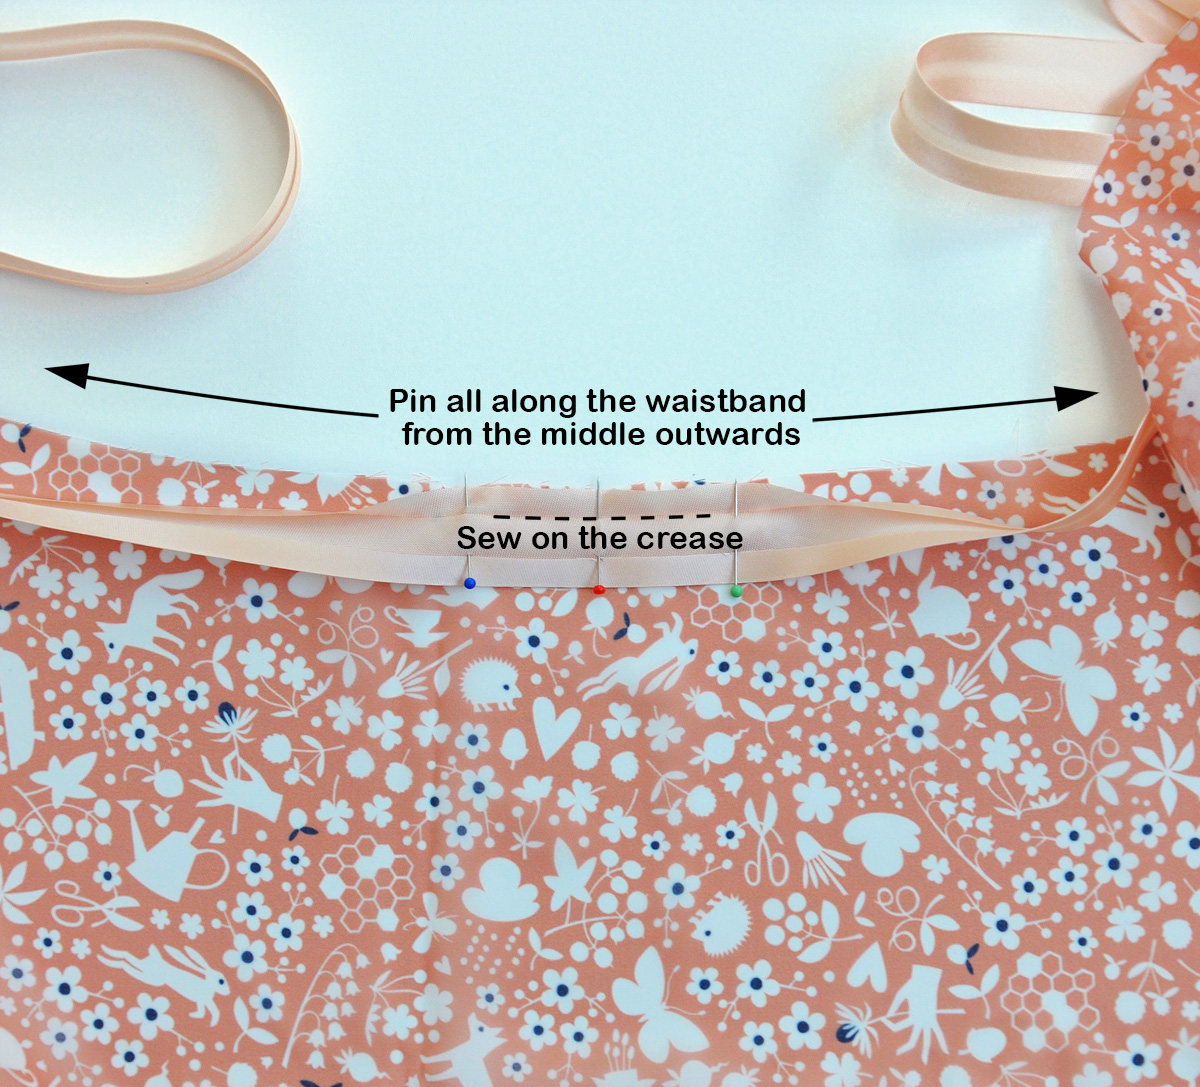
Step 6: Press the Seams
Using a warm iron with a protective cloth over the Chiffon, press all the seam layers upwards towards the binding. Then fold over the bias binding to meet the stitched edge of the seam. Tuck in the raw ends of the binding at both ends. Pin of baste to secure.
Step 6: Machine Stitch Along the Length of the Bias Binding
Machine stitch along the entire length of bias binding to enclose the waist seam. You will have automatically created the ties at the same time. Press the finished waistband.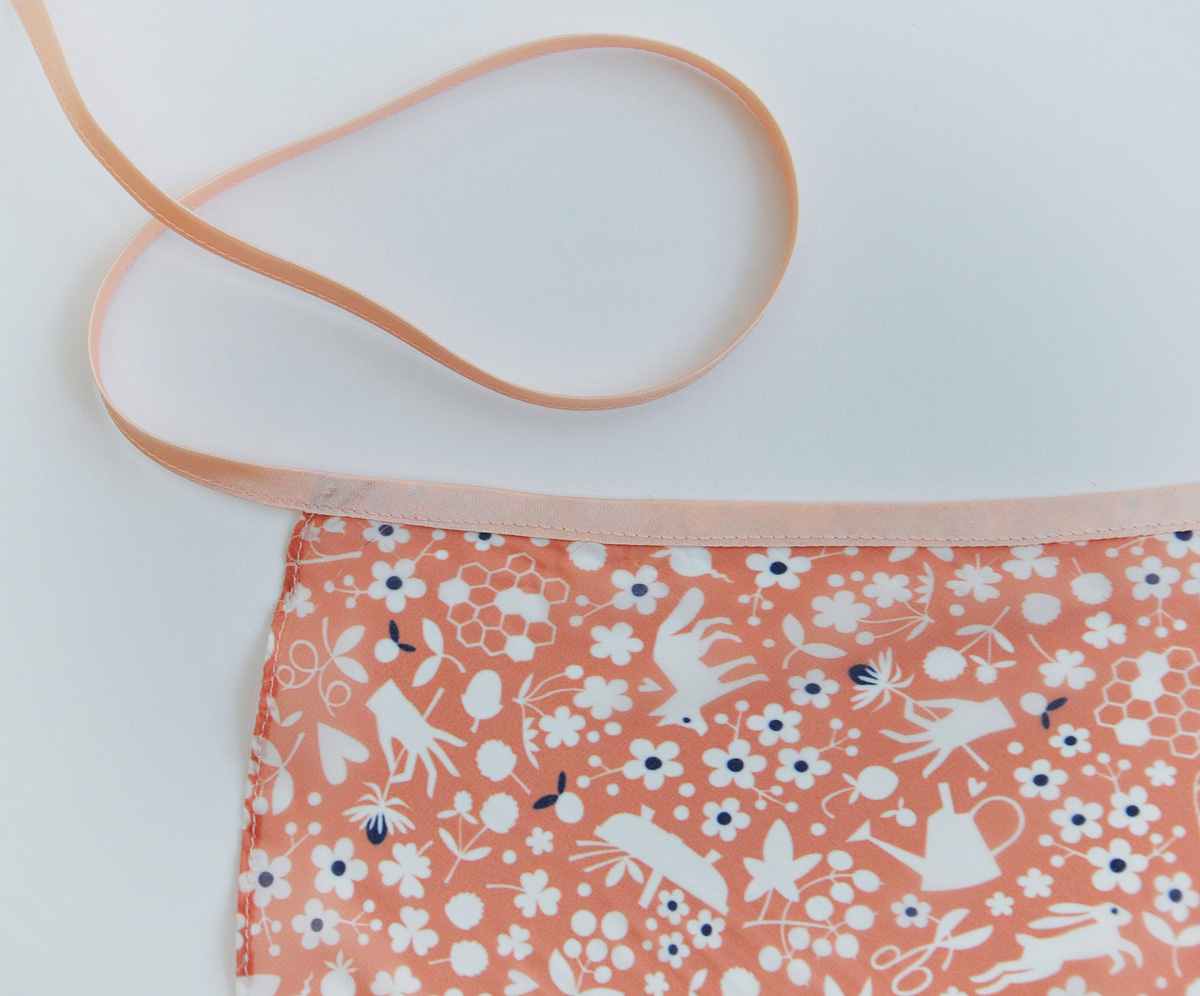

Spoonflower’s Apparel Sewing Blogs
Made to order using unique designs from artists worldwide.
The World’s Largest Design Library for Wallpaper and Textiles
Discover a world of design—from minimalist to maximalist. Thousands of global artists, with new styles added constantly.

Custom Designs on Any Item
Our made-to-order model lets you print any design on any material. Coordinate patterns across rooms for a cohesive, personalized home.

Premium Materials, Always in Stock
Trusted by pros and enthusiasts, our responsibly sourced textiles and papers offer the perfect finish—from smooth to textured, delicate to durable.
Printed on Demand in the USA
Our print-on-demand model lets you choose your design, material, and quantity—minimizing waste with non-toxic inks and reduced packaging.